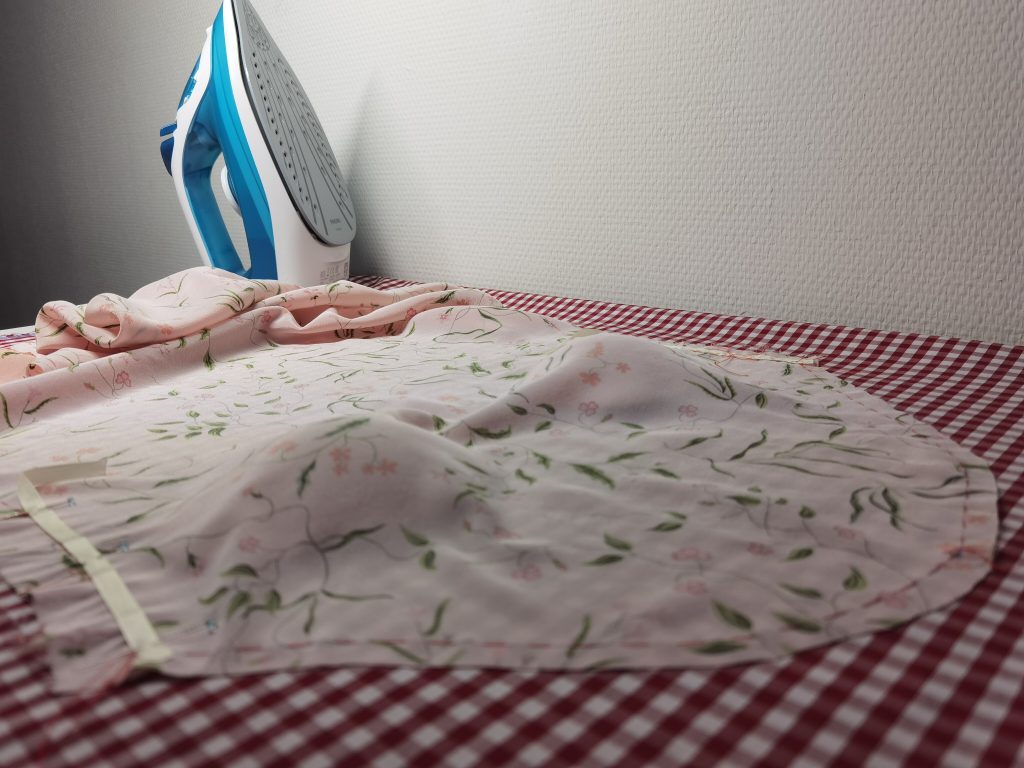
- Shape the chest, waist, back, hip and thigh areas via steam-pressing
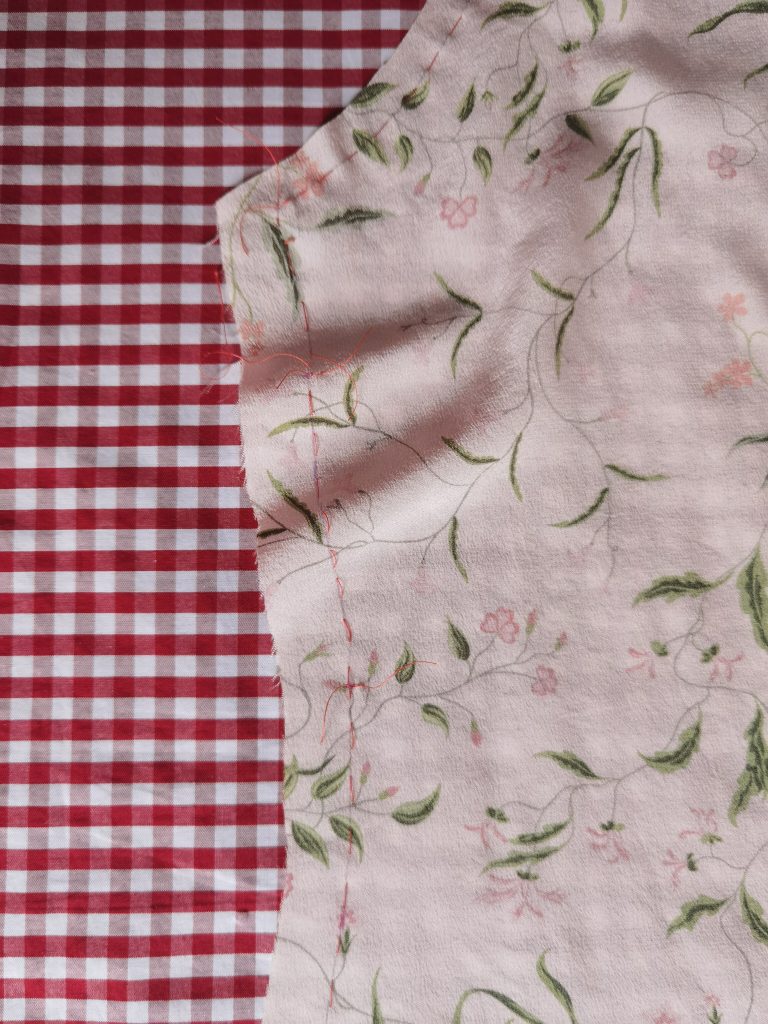
The front piece is longer than the back and curves out a little, which accommodate the bust. The aim of shaping in the bust area is to shrink the length of the side seam on the front piece so that it could match the side seam on the back piece and push the fabric from the side of the bust towards the centre.
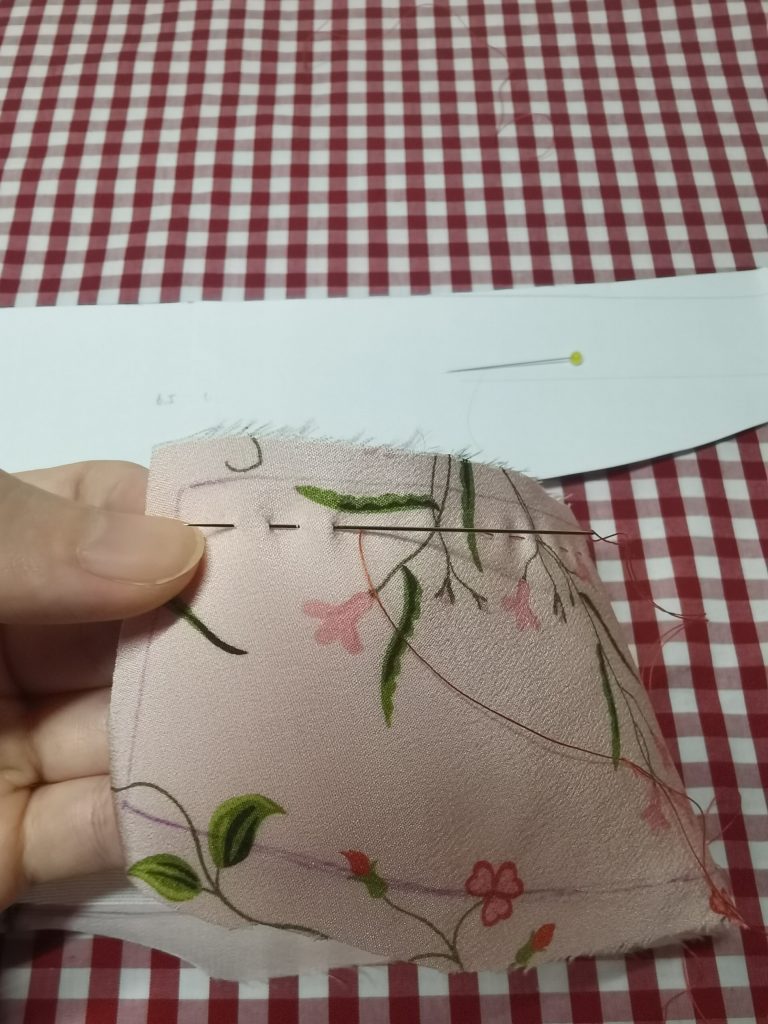
When I match the front and back piece, the side seam at the front is a little longer around the bust.
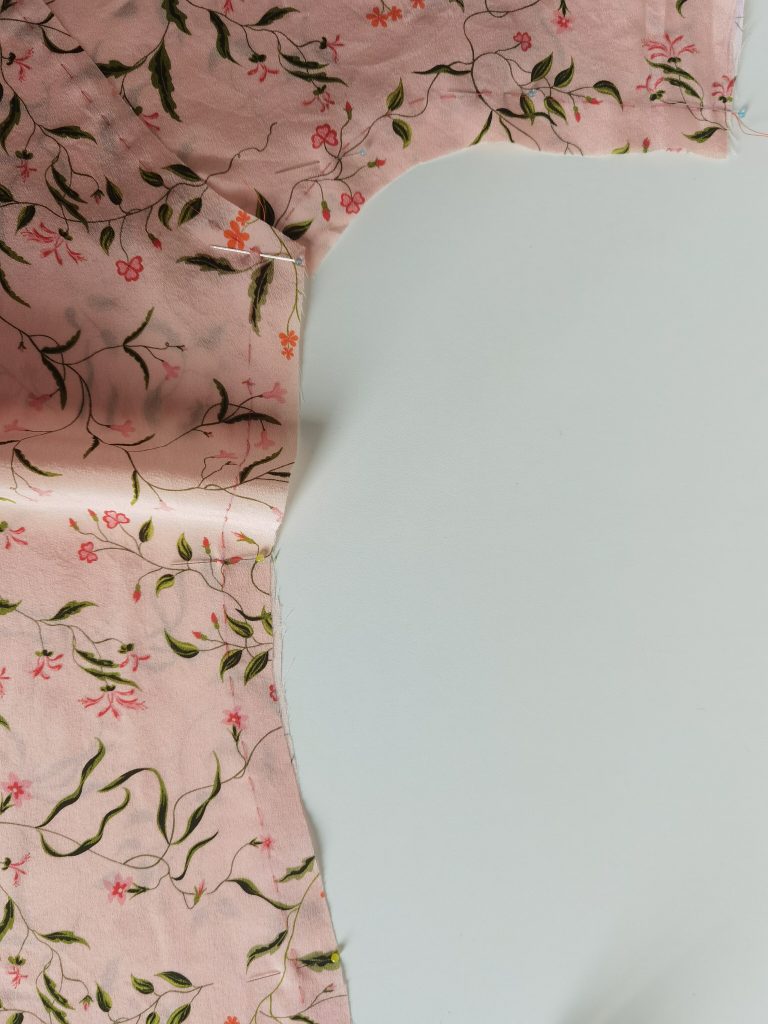
There is also a curve on the front side, unlike the almost straight seam on the back.
There is excess fabric at the side seam as I pull the fabric towards the centre of the bust.
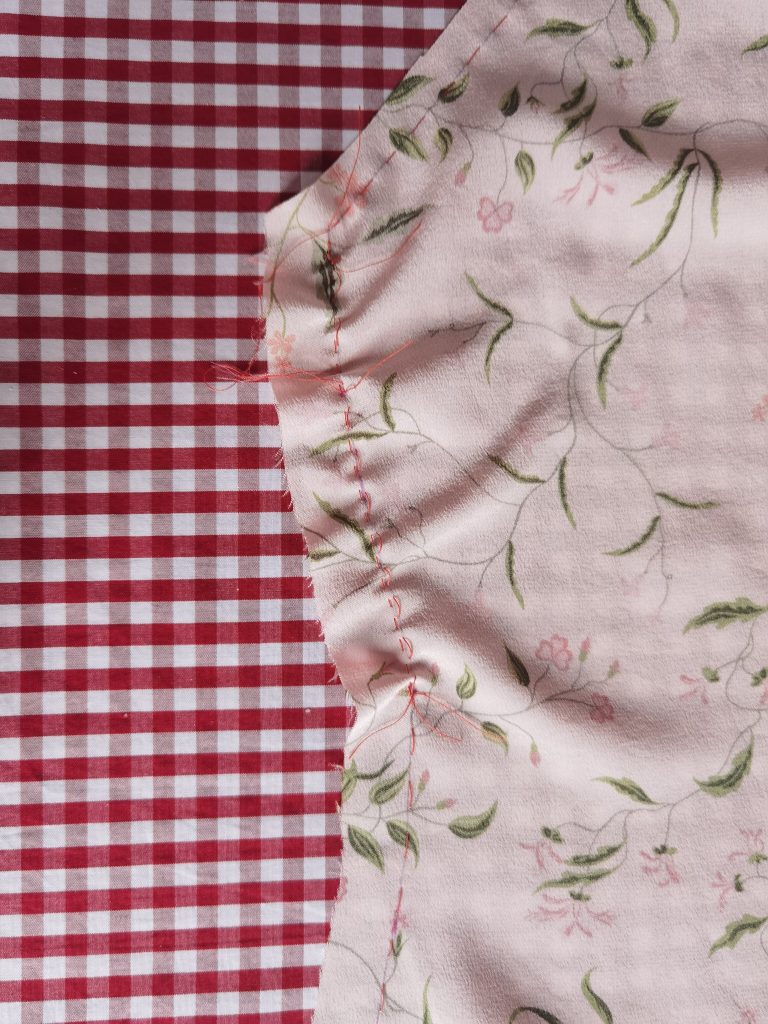
I run a row of small running stitches for about 14 cm around the bust area to pull the side seam into the same length as the side seam on the back. A greater length of running stitches is needed to reduce a greater length of side seam.
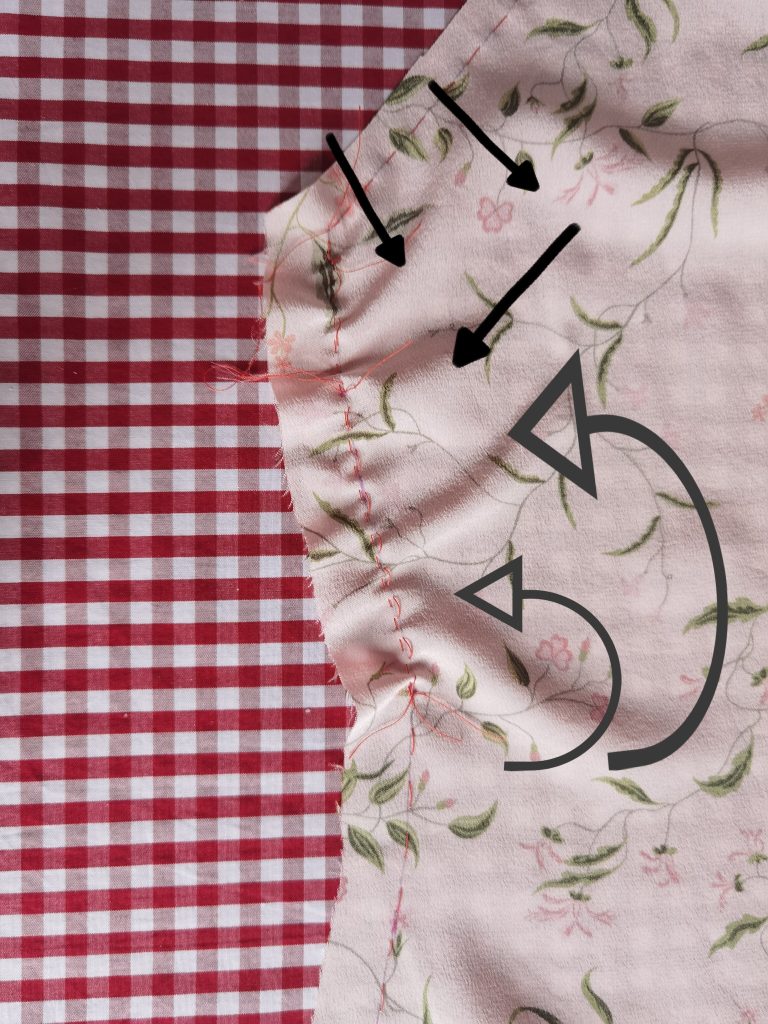
Then, I use a steam iron to smooth out the small gathers. The arrows indicate the direction of the iron (Figure 10-1e). Push and pull the fabric using one hand, and use the sides of the iron to coax the fabric into a new shape. Be very gentle as you do not want any creases pressed into the fabric, which easily happens with steam. Some fabrics are more easily moulded than others. You might need to do it in small amounts over several sessions.
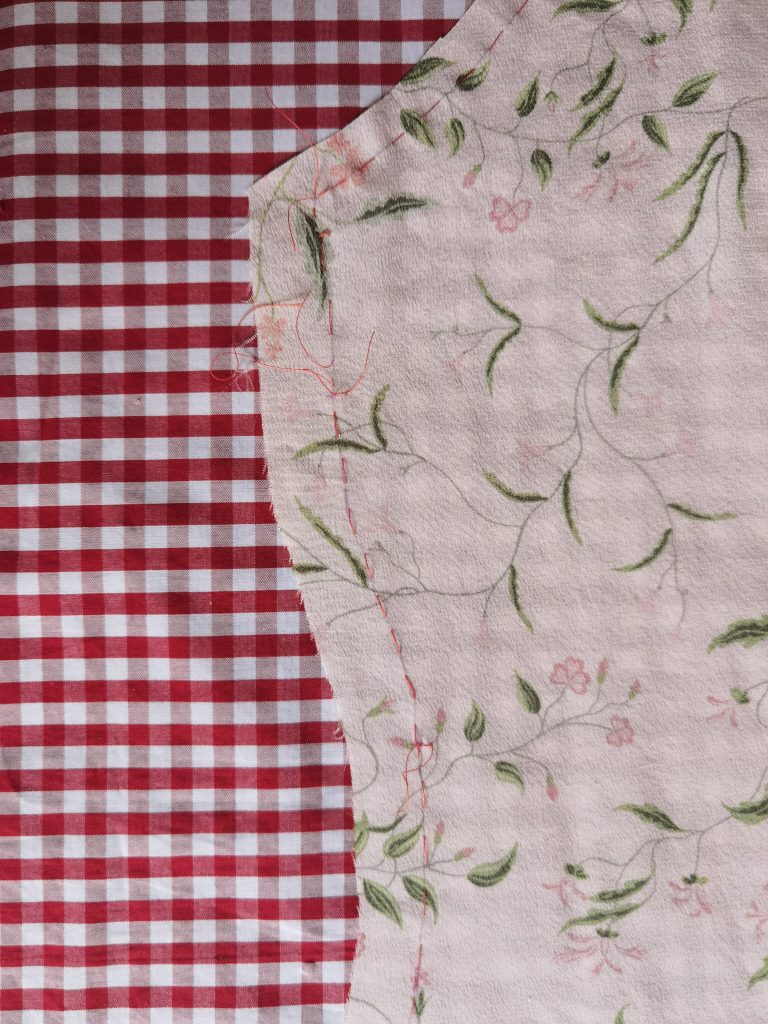
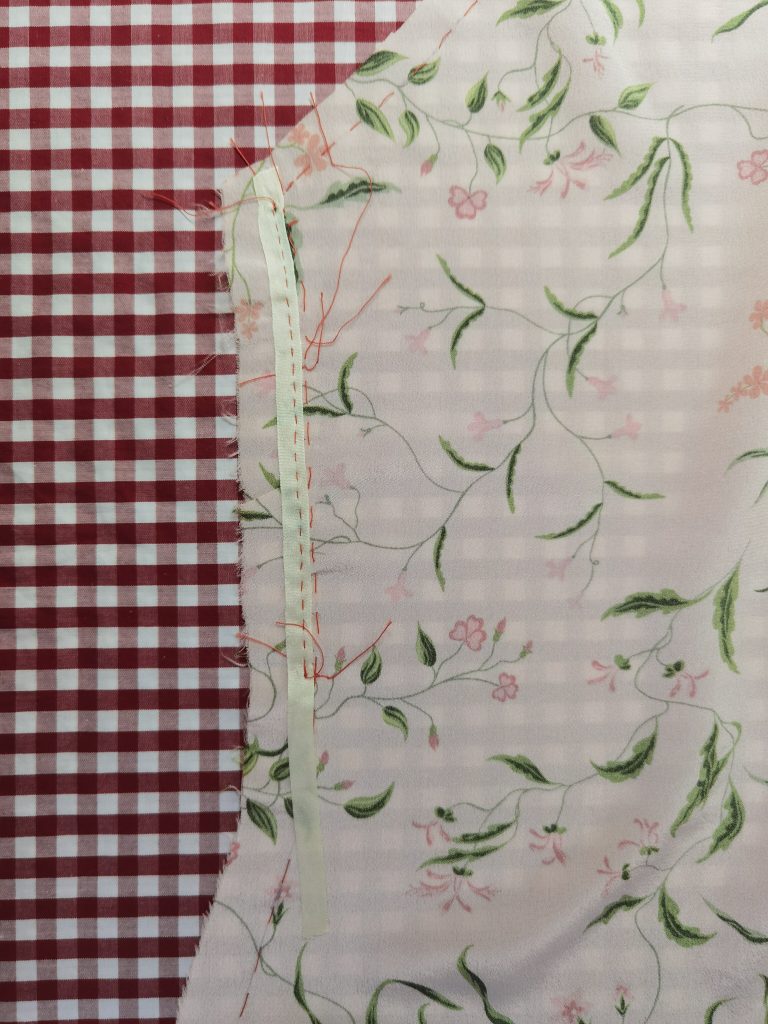
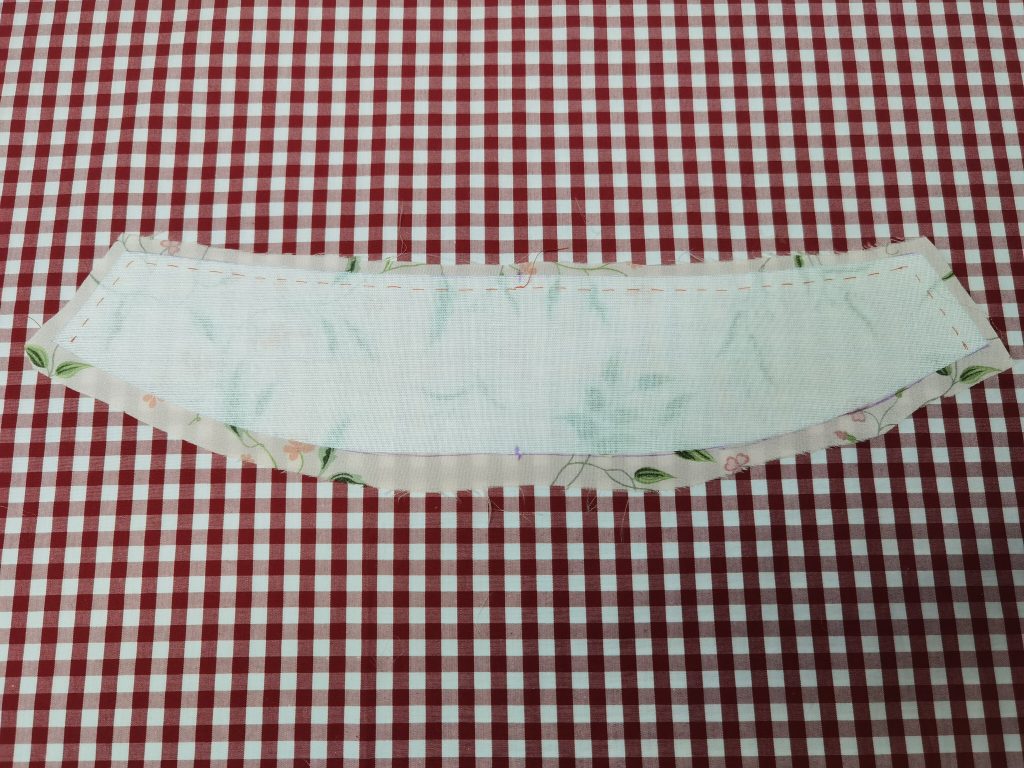
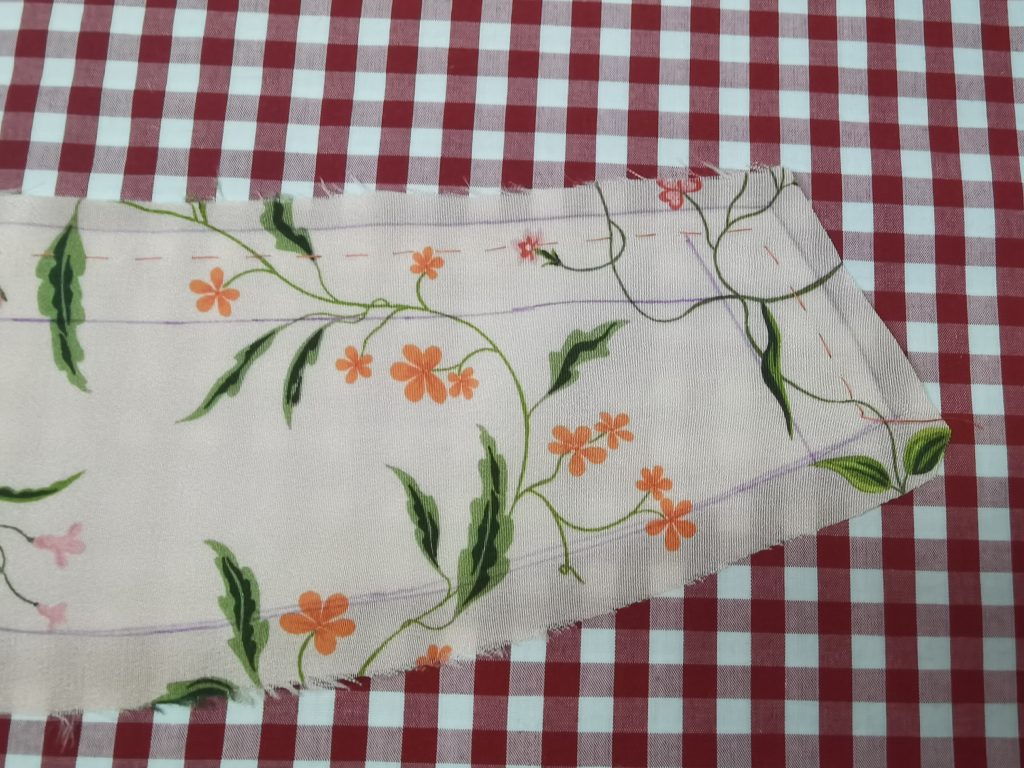
The maximum amount I can reduce over 14cm is 1.5cm, which I am happy with. The side seam now looks straight and matches that on the back (Figure 10-1f). I stabilise it with a thin tape. This should be sewn from the right side if you intend to encase the tape in a French seam later. For the right side of the front piece, since there is no seam allowance, remember to place the tape and running stitches within the pattern.
The fabric has been moulded so that it no longer lays flat. I check this by putting a pair of bra padding underneath the bust area.
Use the same method to shape the hip and thigh areas. For the hip area, I sew running stitches 10cm respectively above and below the hip point and reduce the length on the seam on the back piece by 1.5cm. For the thigh area, I sew running stitches 5cm above the hip point and 20cm below and reduce the seam on the front by 2cm. I prefer that the front hem either hangs straight or sways backwards a little.
- Making the standing collar
I like to finish the collar as early as possible, since a sturdy, fitted collar makes sure that the entire dress hangs correctly on the body. You will have three layers for the standing collar: the main fabric, the lining and the interfacing. There is no seam allowance for the interfacing, and I trim away the seam allowance for the main fabric later. If using fusible interfacing, attach it to the main fabric with an iron. If the interfacing is not fusible, baste it to the main fabric close to the seam on the top and sides (pictures below).
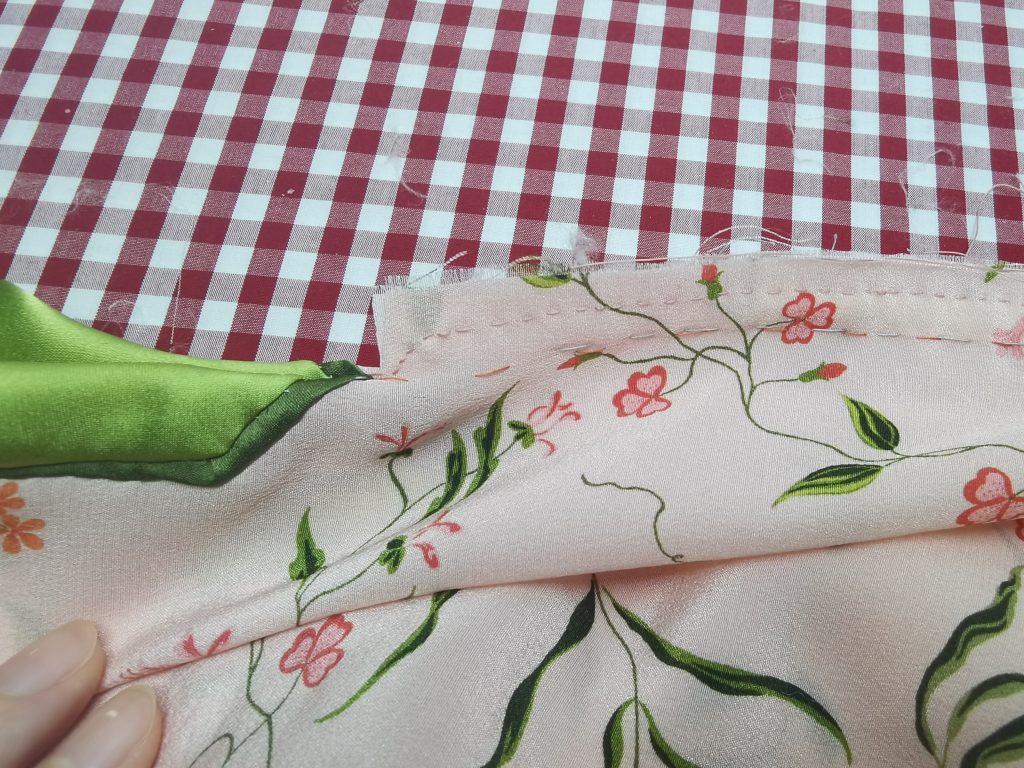
Next, I sew the binding. The row of dark green is 2mm and the light green is 1.5cm. My dark green tape is thus 1cm wide and the light green tape is 4cm wide. I first draw a line 1.5cm away from the seam.
Align one edge of the dark green tape with this drawn line, right sides together, and stitch 2mm away from the edge. Because the silk bias tape is very stretchy and 2mm is a narrow width, you can just lightly bunch and stretch the tape at the corners. Fold it over and press.
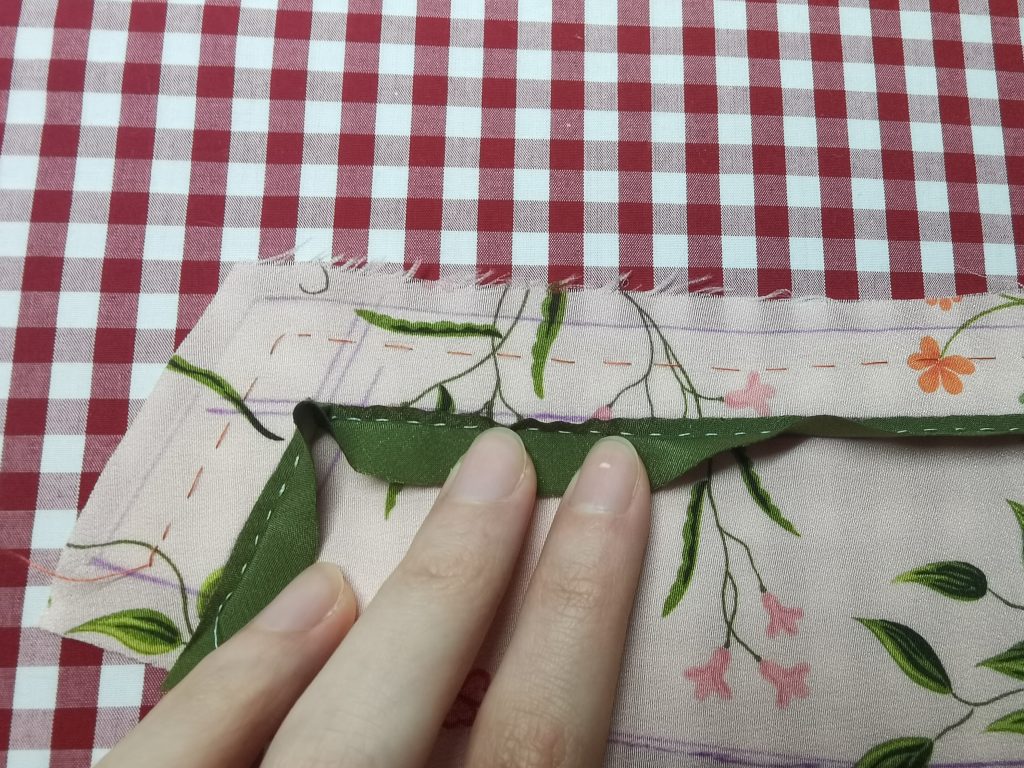
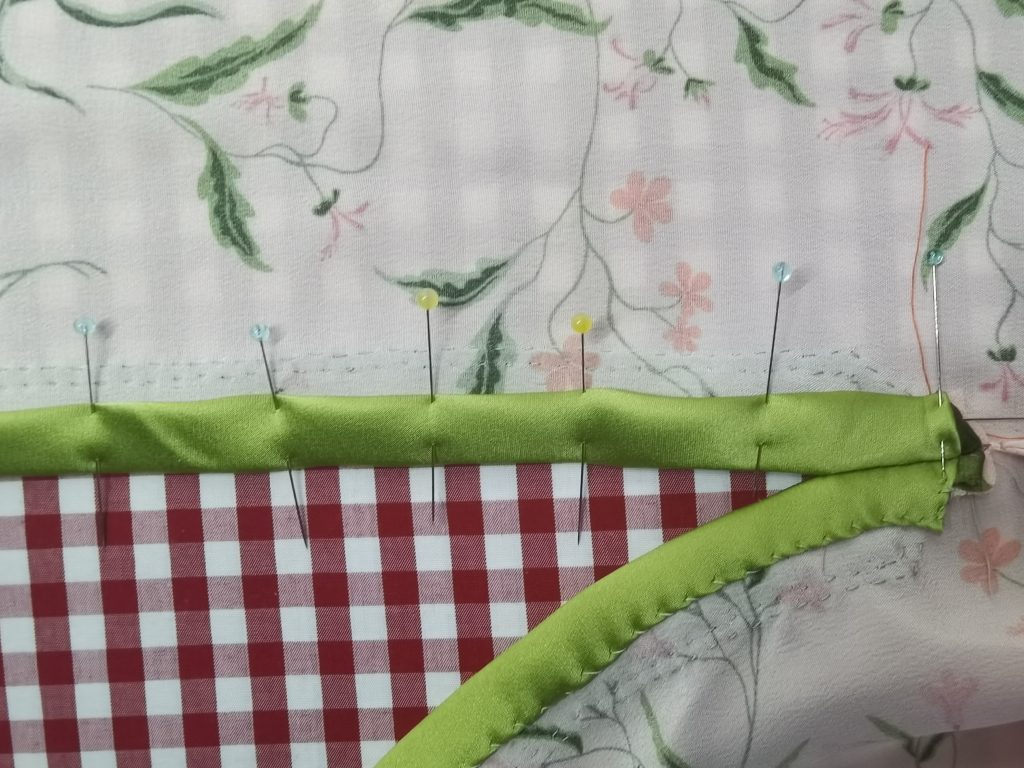
Place the light green tape on top of the dark green tape, right sides together, and stitch the light green tape at 1.5cm away from the seam. I find it helpful to baste first so that I don’t have to maintain the width of the silk bias tape and do tiny stitches at the same time. Make mitered corners. Fold the light green tape so that it is right side out, and press with steam.
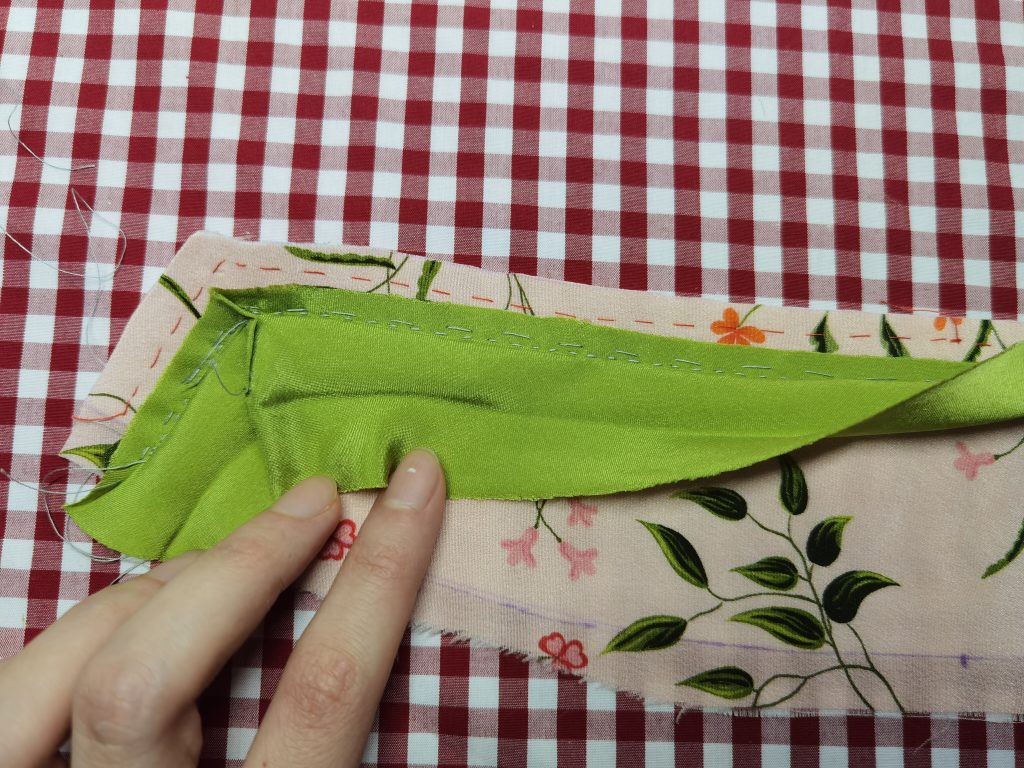
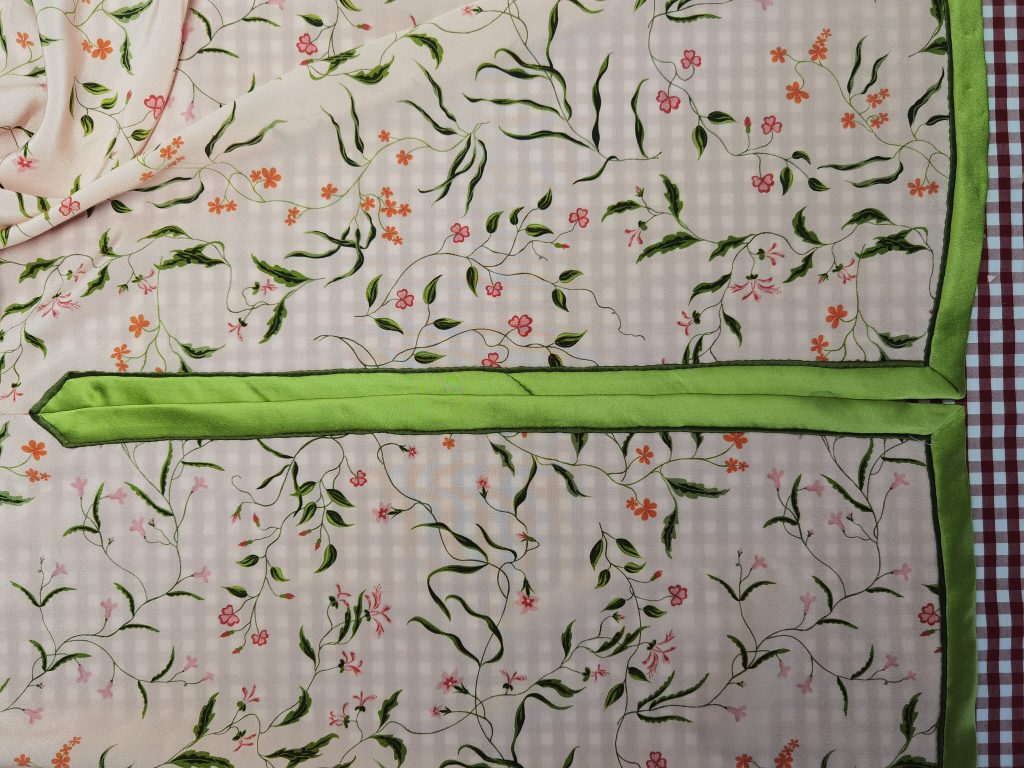
After that, fold over the light green tape to the wrong side of the collar, and press with steam again. Finally, whip-stitch (or use whatever stitch you prefer) it onto the interfacing, but not through the main fabric (picture below). If you are using a fusible interfacing and cannot separate it from the main fabric, you can use an adhesive, but on the edge of the bias tape only and away from the edge of the collar. Leave the lining unattached.

I use this method for all the places on the dress with the same finish, except that in other places, I fold the raw edge of the tape under on the wrong side and press lightly before whip-stitching.
(Some makers sew multiple rows of tapes together and treat it as a single one afterwards. I find it incredibly difficult to do this whilst keeping the widths of the silk charmeuse tapes even, without some sort of starching or stabiliser. If you can control your tapes better, this is an entirely valid method. It works better if you are applying the bias tape onto mostly straight edges, as straight running stitches reduces the flexibility of the tapes.)
Press a crease for the bottom seam that is going to be attached to the neckline, too.
- Shaping bias tape for the neckline on the bodice
Draw the neckline onto the main fabric and stabilise it with one or two rows of running stitches to prevent distortion. You can cut open the neckline at some point after this to hold the fabric more easily.
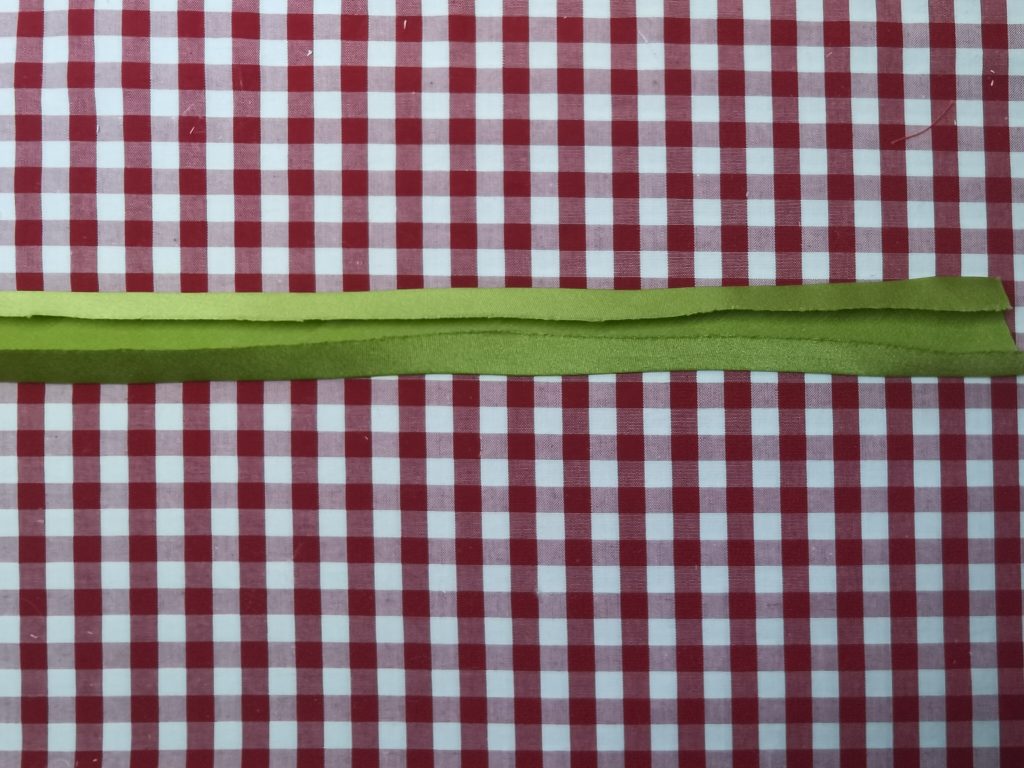
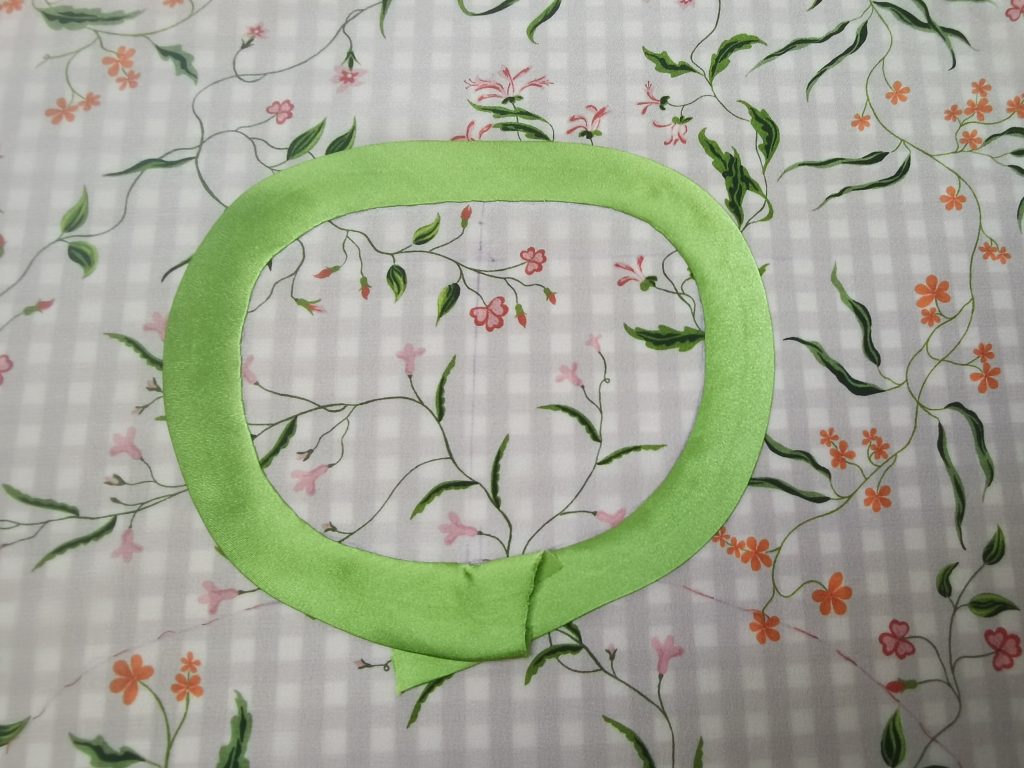
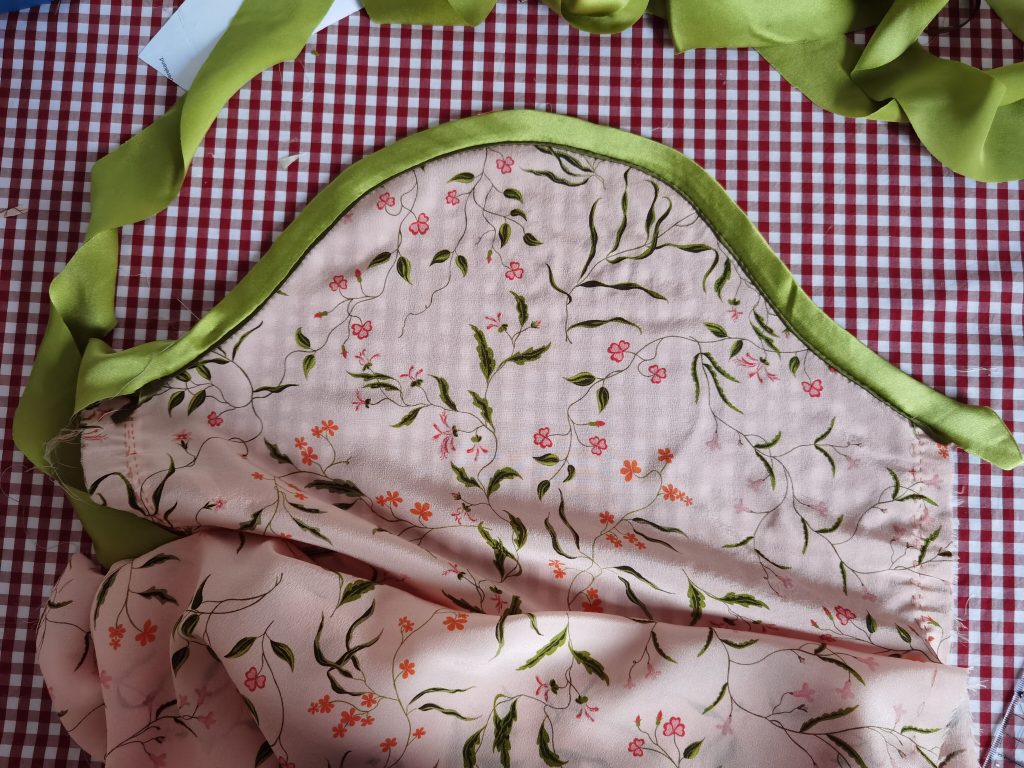
The neckline decorations are appliquéd to the main body. I first fold and press the light green tape to the desired width. I meant to do 1.5cm but accidentally made it 2cm, which is why it looks a bit wide in the pictures. In general, though, if the finished neckline binding is wider than 2cm, I would simply cut a piece of fabric simply in the shape of the neckline, as it is very difficult to shape a wide bias tape into a tight curve.
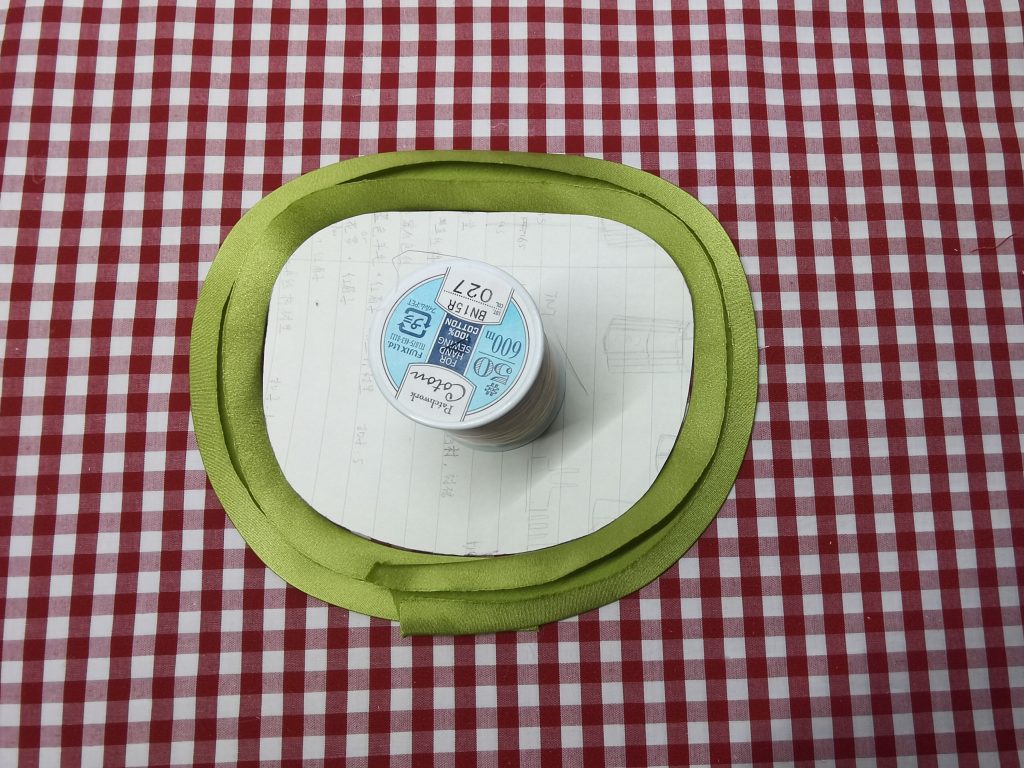
Cut a separate piece of sturdy paper in the shape of the neck opening and place it on the pressing table or cloth. Gently curve the bias tape, wrong side up, and press it into shape with steam. Remember to leave some extra tape on the ends at the CF.
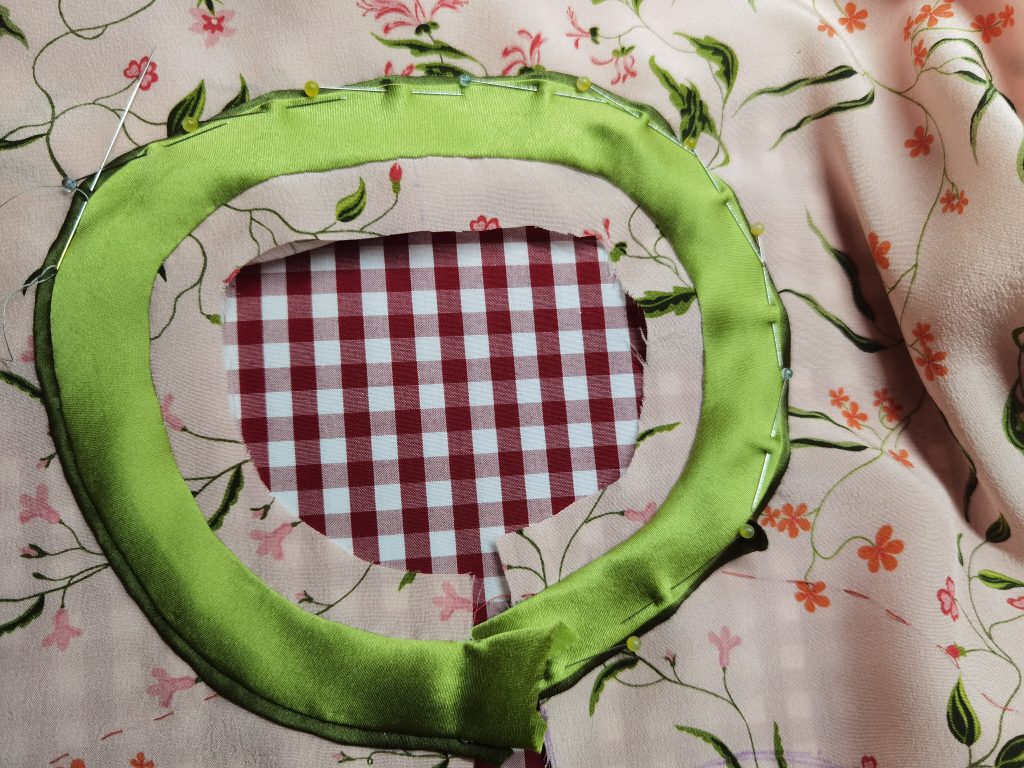
When the collar has dried and cooled down, place it onto the main fabric, both right side up, and stitch the inner circle (i.e. the neckline) to the main fabric with an invisible slip stitch. Draw the outer circle onto the main fabric.
Lift light green tape and align the edge of the dark green tape with the line of the outer circle and stitch 2mm away from it. Fold over and press. Finally, pin the outer circle of the light green row into place and appliqué with an invisible slip stitch.
This process would be a lot easier if you apply a very thin layer of temporary fabric glue.
- Attach the collar to the bodice
Align the neckline to the bottom seam of the collar and stitch through only the main fabric of the two parts. Clip the seam allowance on the neckline and baste first if needed.
To finish the standing collar, sew on the lining. I just fold the raw edges under, press and whip-stitch it to the collar, carefully avoiding stitching through the main fabric (Figure 10-4b). I use my left hand to curve the collar so that the lining is actually a little less wide (horizontally—not less tall) than the main fabric, which help the finish collar to naturally curve and fit the neck better. This is difficult to do when you are sewing from the lining side, but just try your best.
This method of attaching the lining has the additional advantage that it is relatively easy to change the lining without taking apart the whole collar.
- Sew the under-layer of front opening
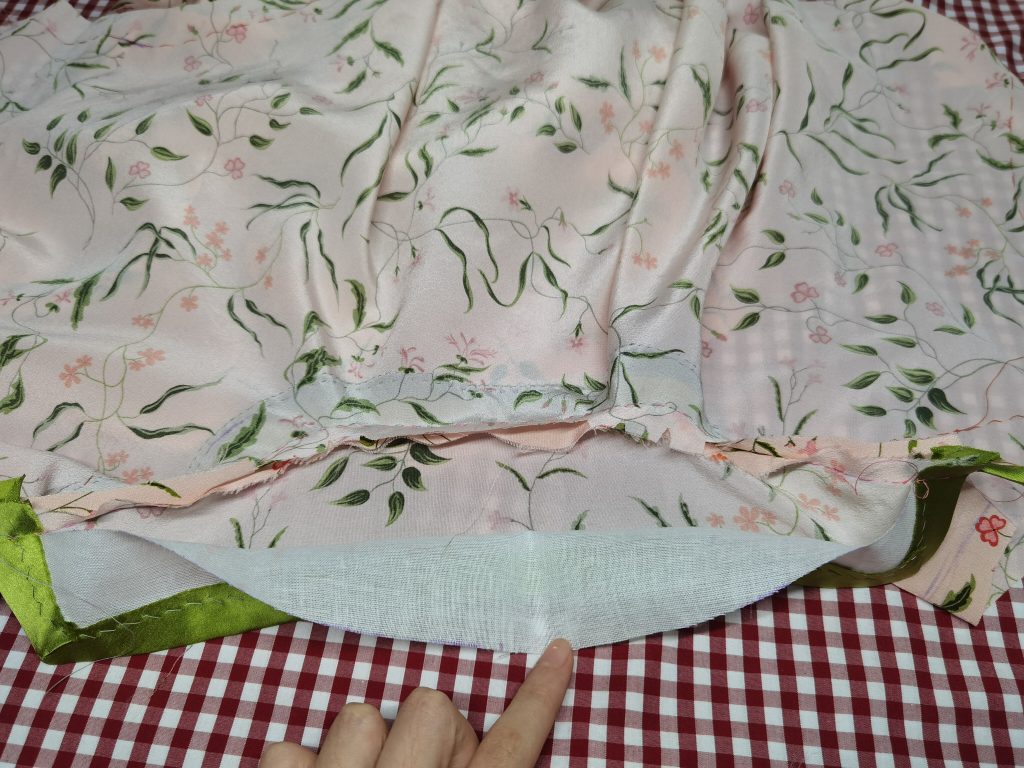
I then attach modesty panel to the wide seam allowance on the main body, indicated by red line in the picture below.
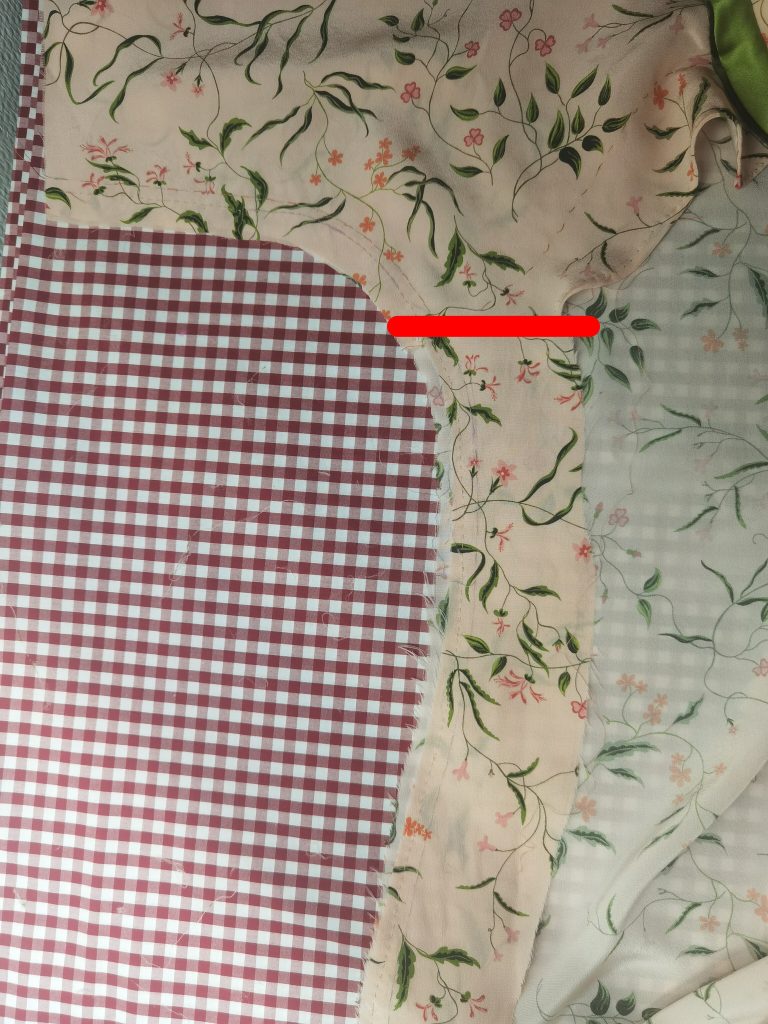
I double-roll the raw edge from the neckline to the bottom of the modesty panel and whip-stitch it. There is hardly any seam allowance along the CF for the main fabric so I fold over the bias tape to cover the raw edges.
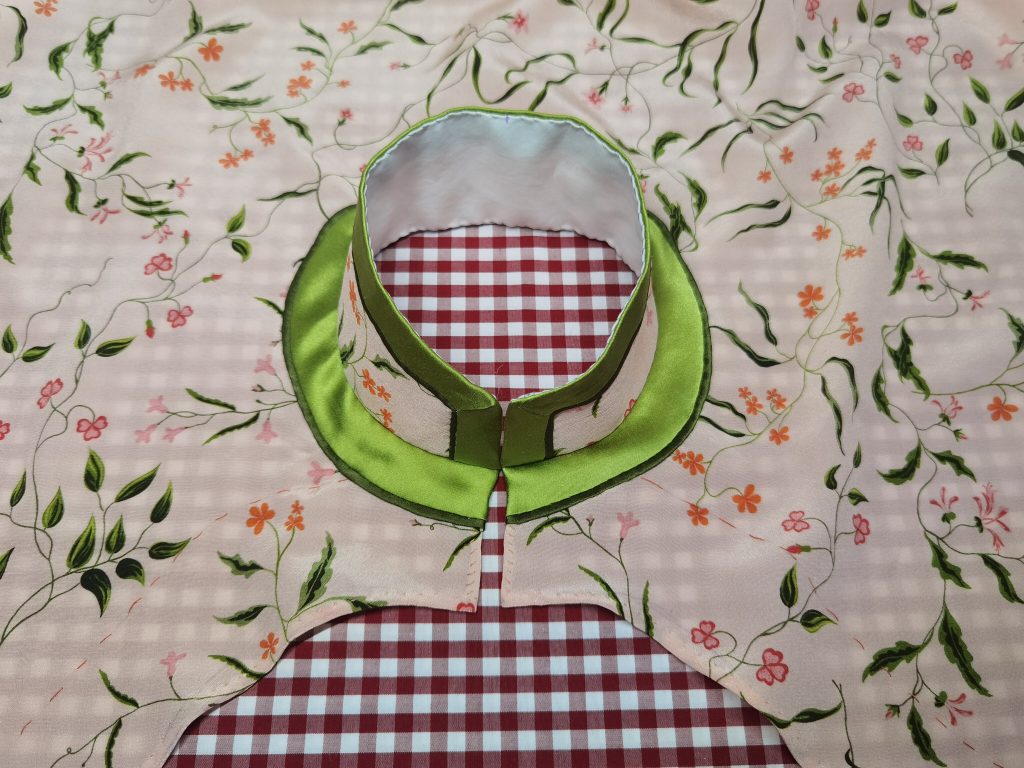
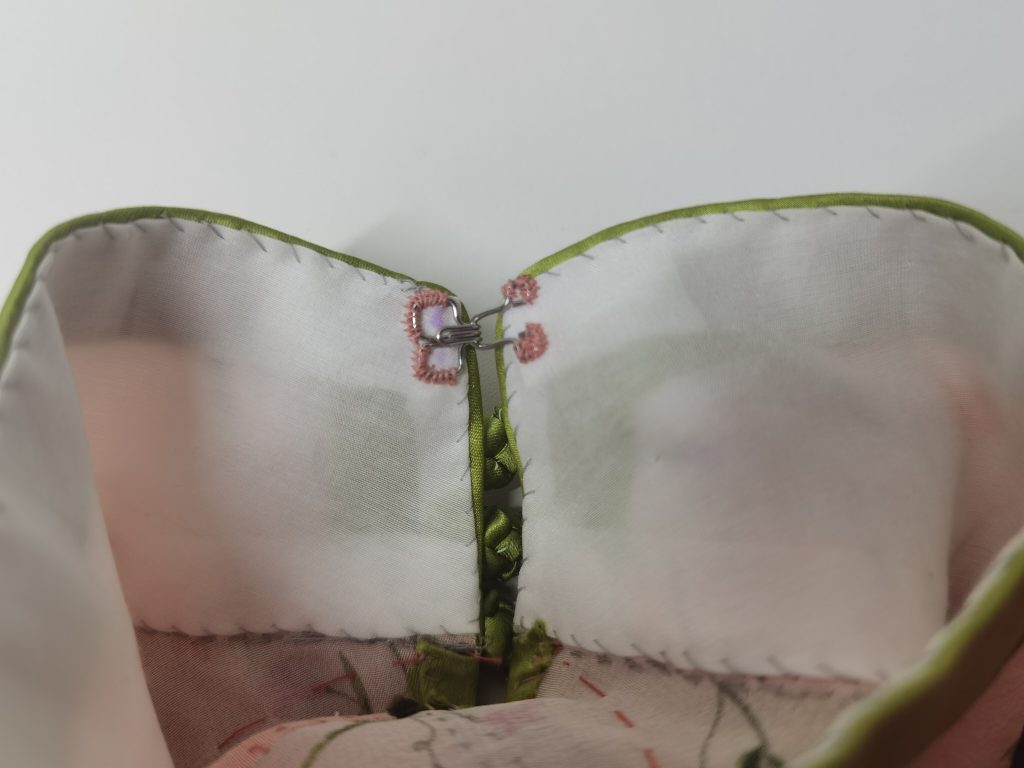
Image caption: It is okay if the two sides do not close at the CF. This will be covered by the front piece.
- Finish the neck opening of the upper-layer
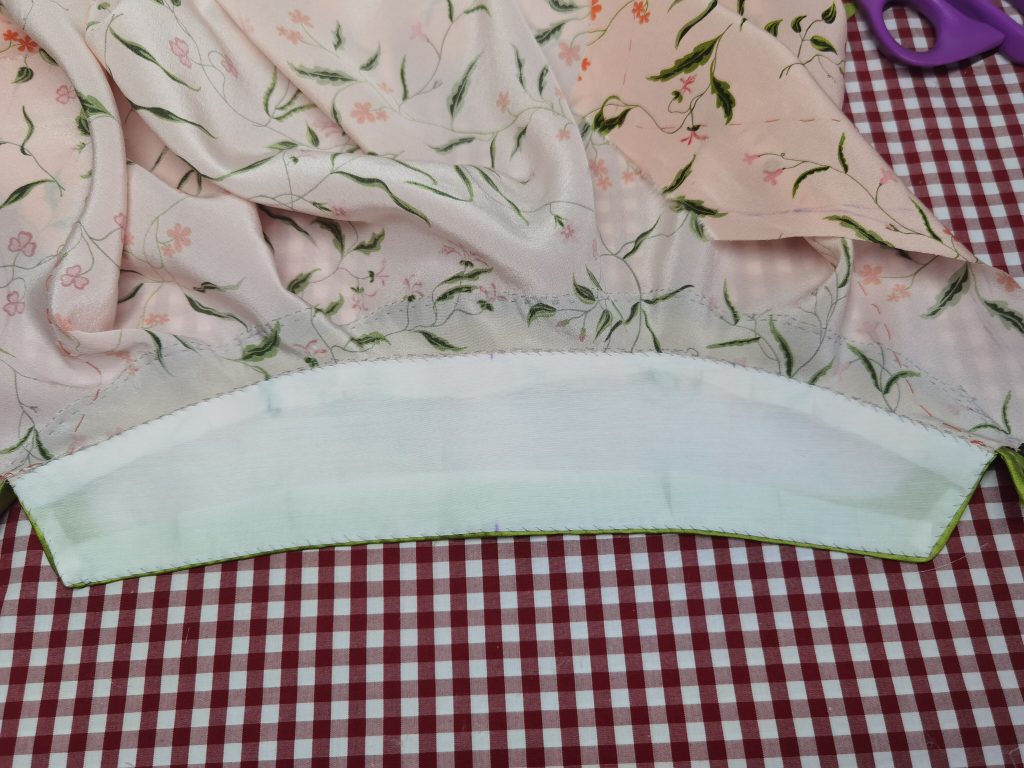
Stabilise the curved lines on the neck opening of the front main piece and finish the edge. There is no seam allowance along this edge.
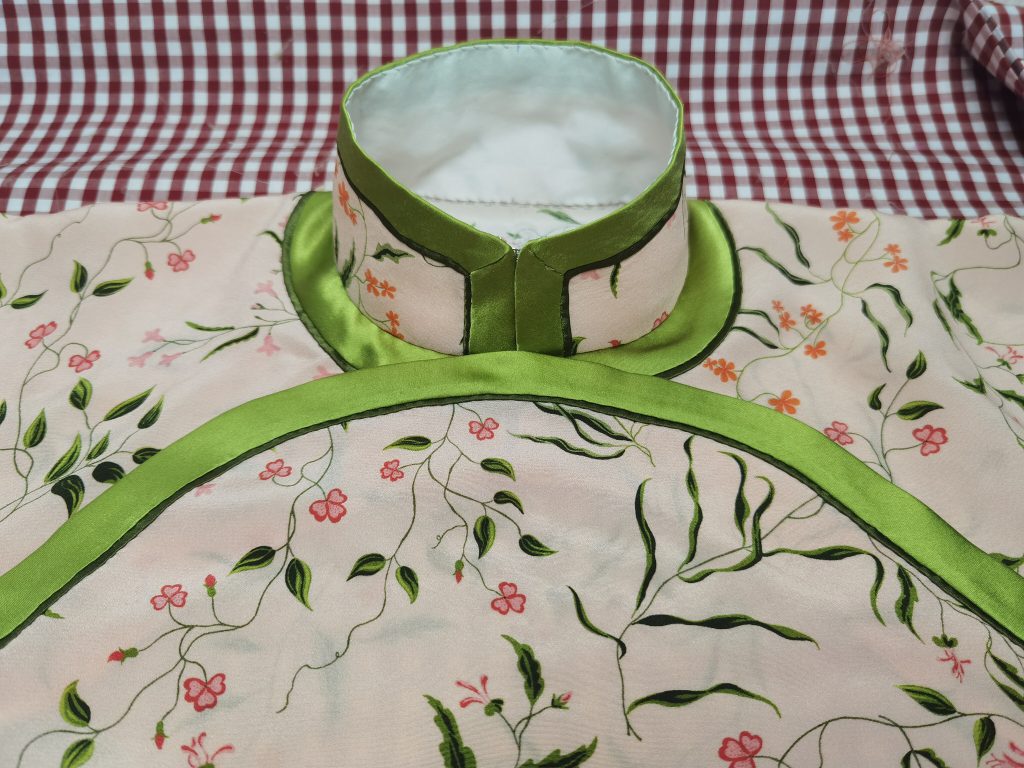
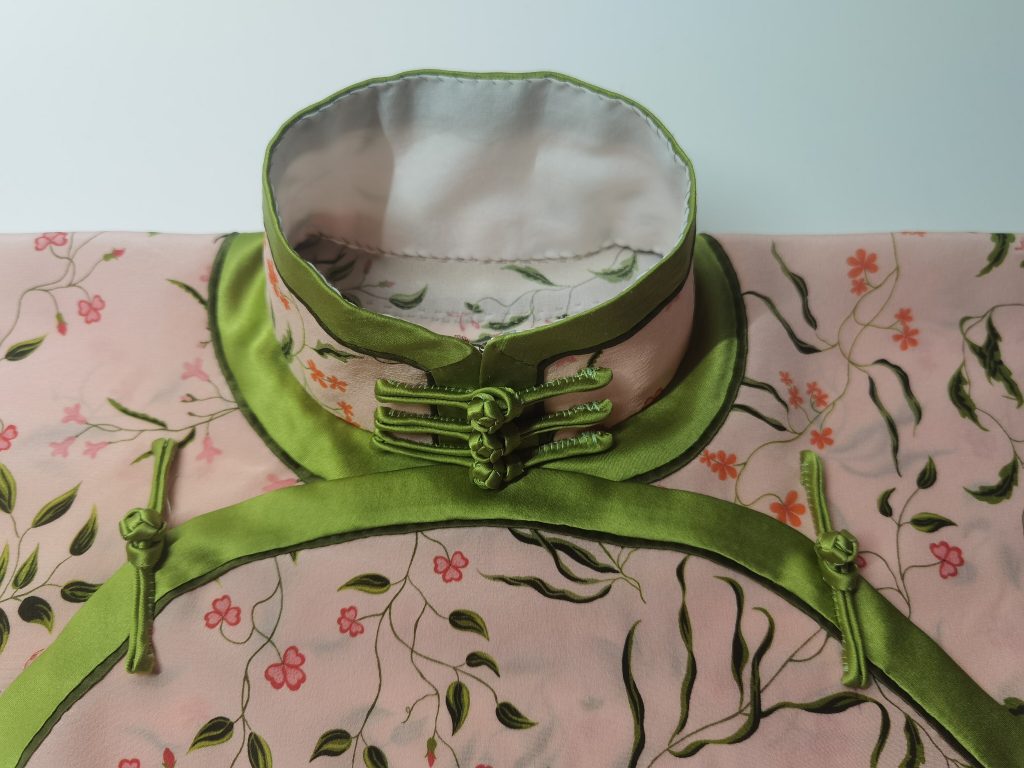
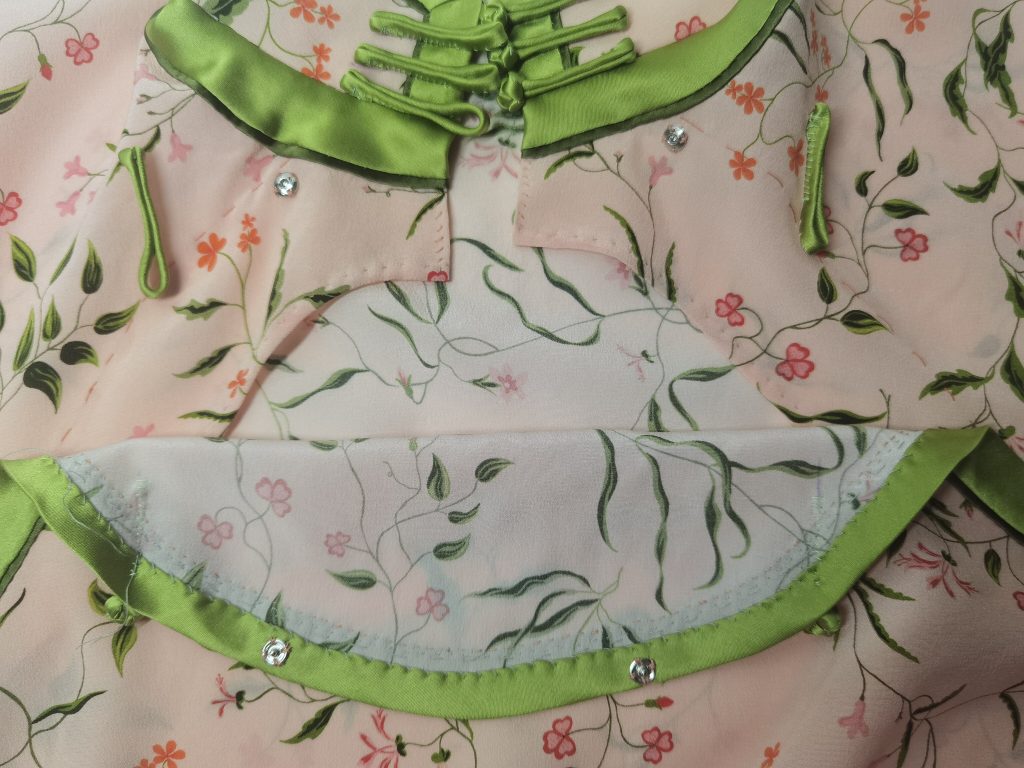
Above: Finished collar and opening, bar buttons.
- Finish the first row of French seam for the sides.
On the left side, the side seam is between the front and back pieces of the main body. Pin the shoulder section and the main front piece together at the side seam and sew as one piece. On the right side, the side seam is between the back piece of the main body and the modesty panel. Baste or pin to check that the front and back parts of the side seams align.
The side seams will be French-seamed. Sew the first row of a French seam, about 6mm away from the seam (the width depends on the thickness of your fabric), all the way from the cuff to about 20cm away from the top end of the slit.
- Finish most of the raw edge on the front piece
Continuing from the top curve in Step 6, sew the binding all the way down the right side. Double-check the length and symmetry of the front hem and that the hem curves up for an appropriate amount. Finish the binding on the hem and up the left side slit. Leave about 20cm of the slit unfinished.
- Finish the left side slit
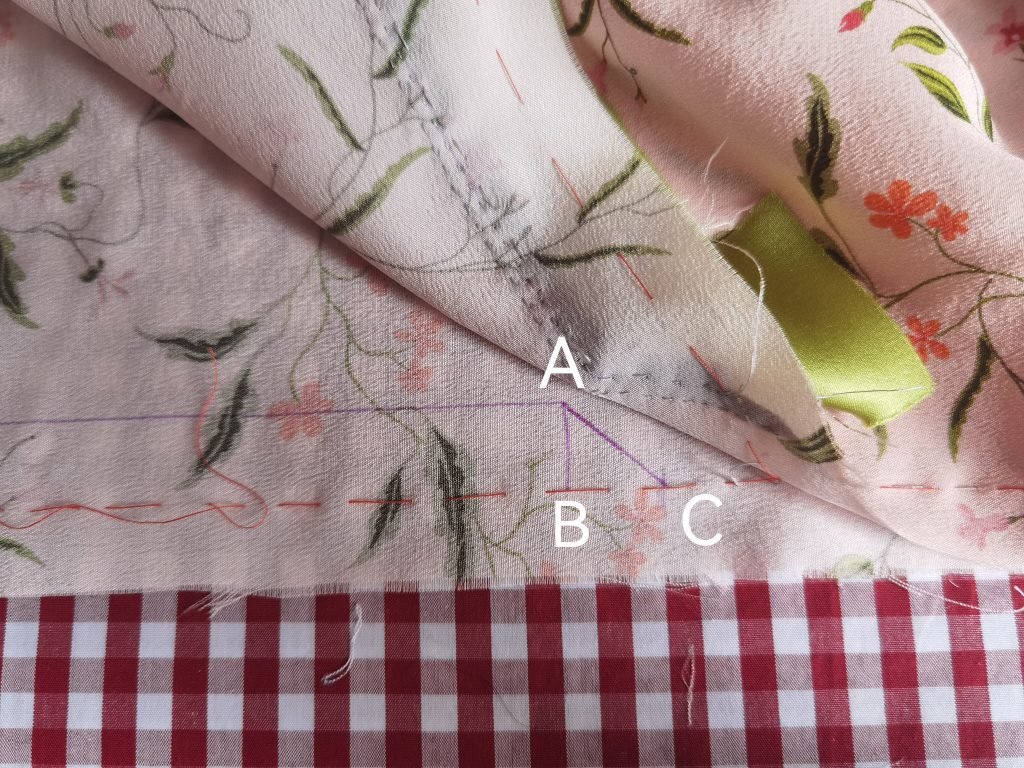
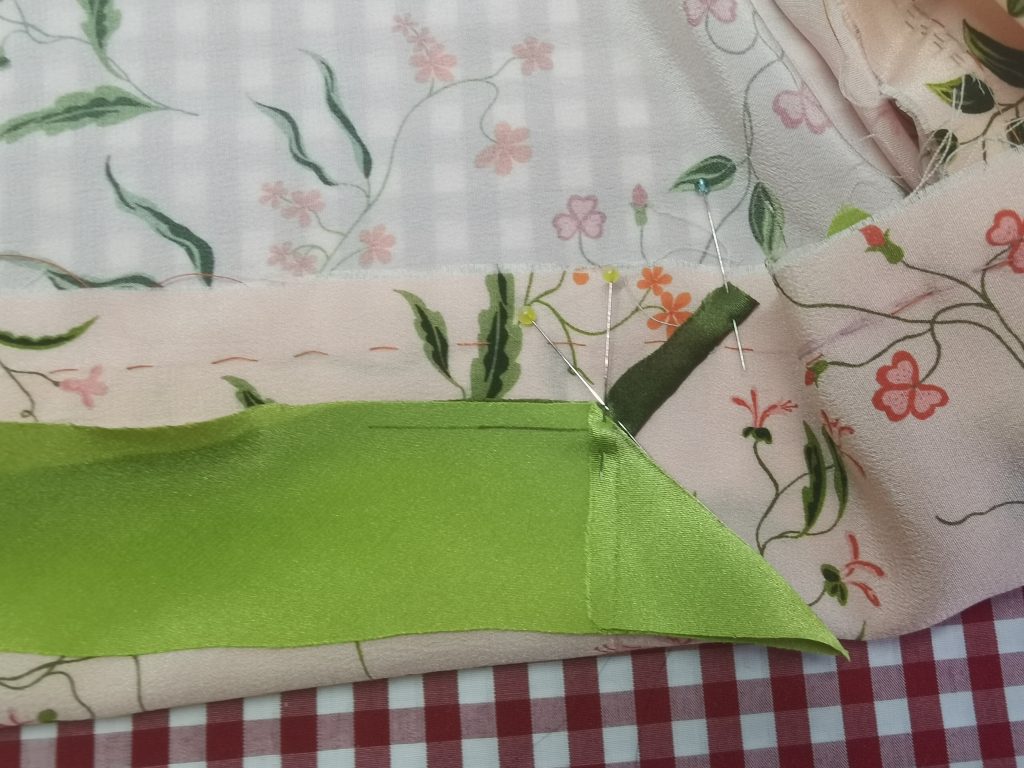
Draw the ink line to Point A, which is parallel to the top end of the slit (Point B). Mark the point 1.5cm higher than this on the side seam (Point C) and draw a triangle with a right angle and two 45-degree angles, as shown below.
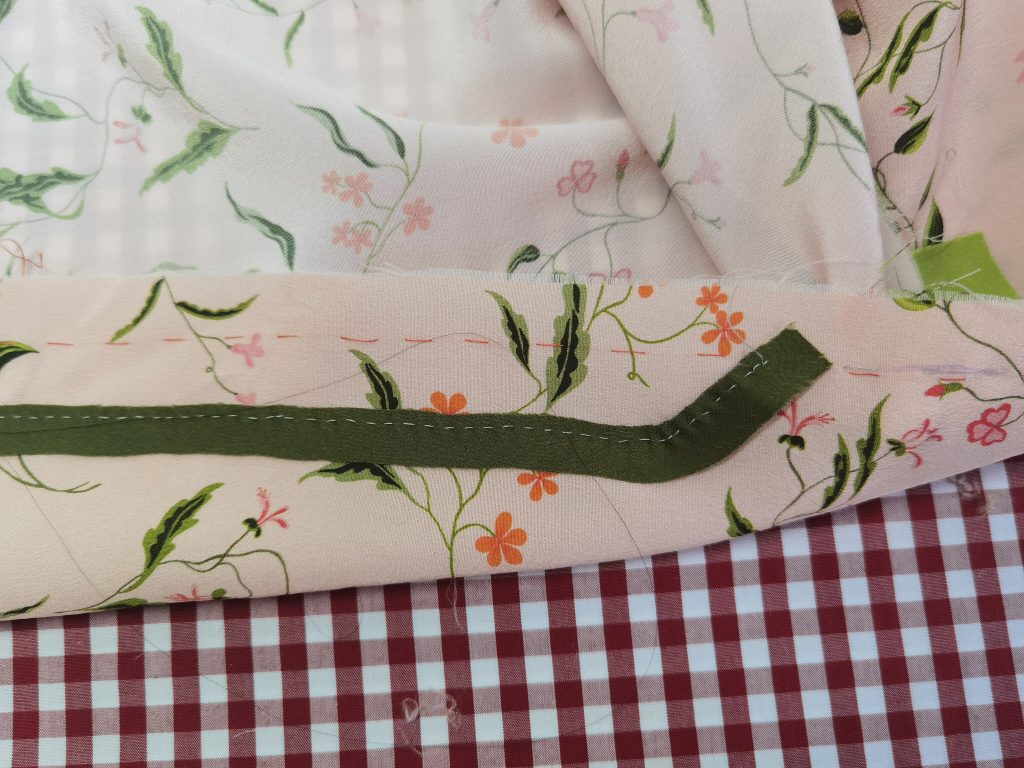
Sew the dark green tape to the side seam, fold over and press
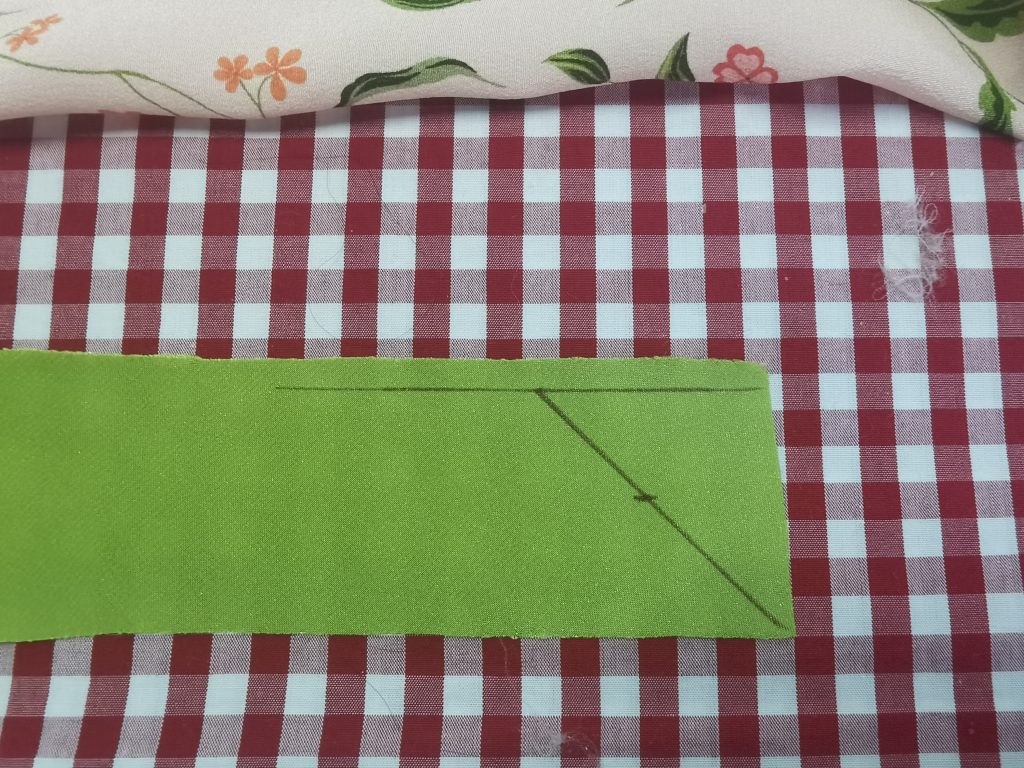
On the wrong side of the light green tape, mark the line that is going to be stitched to the ink line on the main fabric. Draw a line at a 45-degree to this.
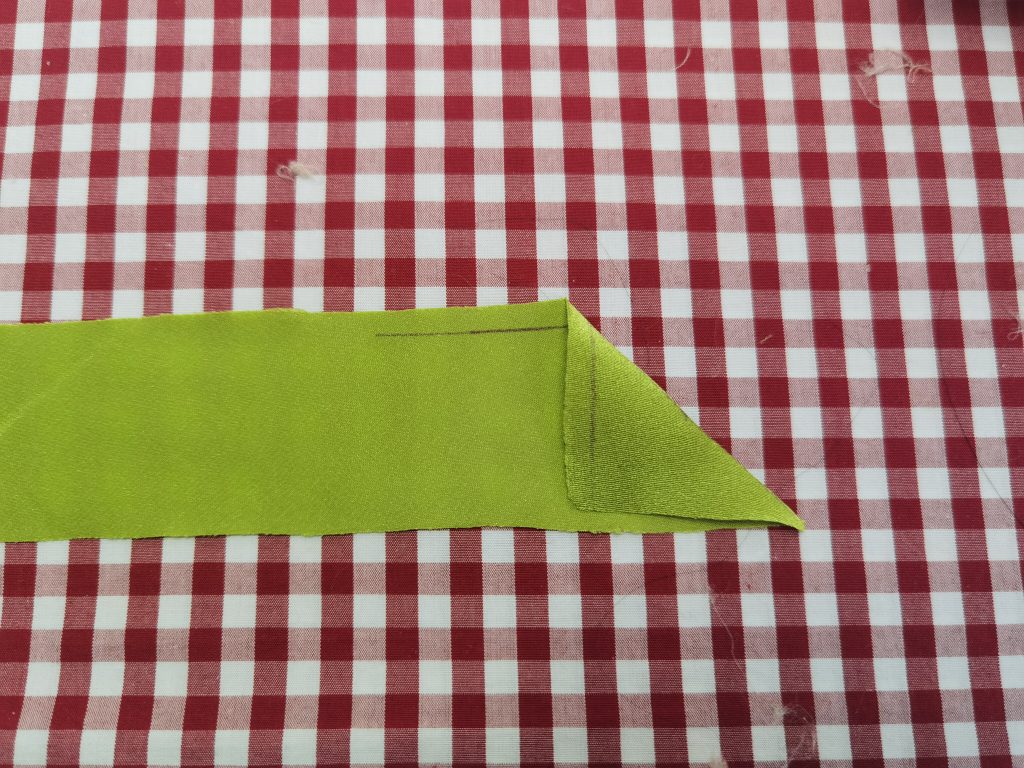
Fold along this diagonal line, wrong sides together, and press.
Pin the light green tape to the main body. Continue the unfinished stitching from Step 8 all the way to the diagonal line
Fold over the light green tape and press. For a narrower and more stable binding, it would be okay to leave the diagonal edge open. For this wide silk tape, I sewed it down in invisible slip stitches. The stitches need to go through all layers.
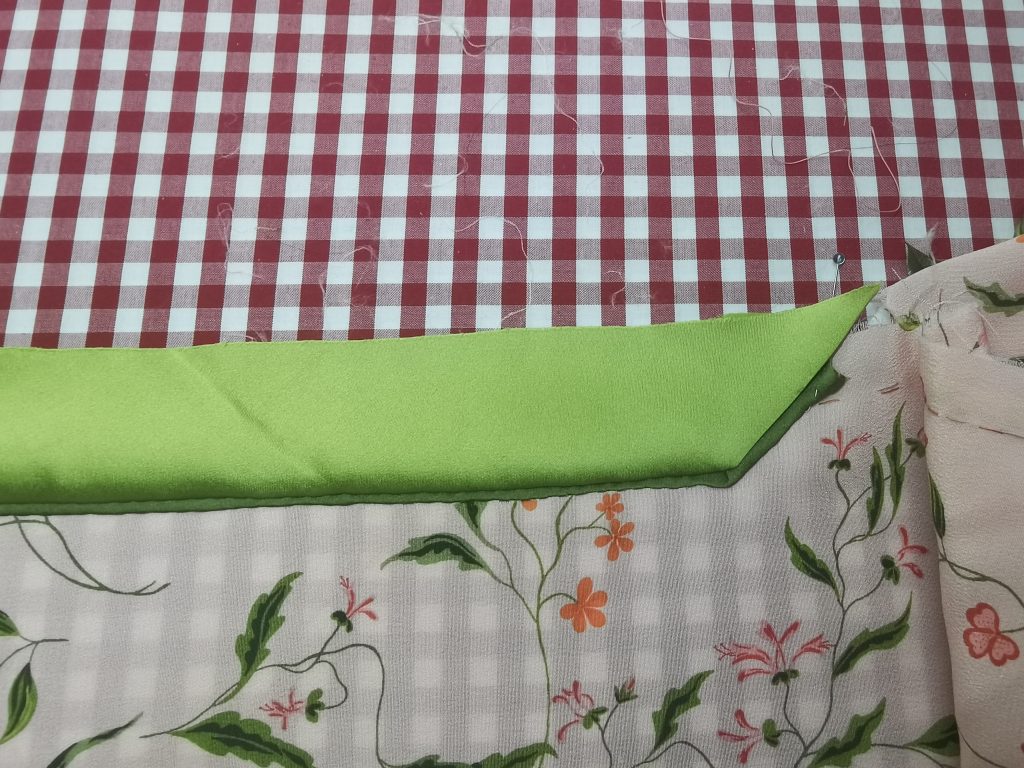
From the very top tip of the corner, draw the side seam onto the light green tape to Point A. Baste the bias tapes to the main fabric, 1mm away from this line in the seam allowance.

Finish both the front and back sides of the slit.
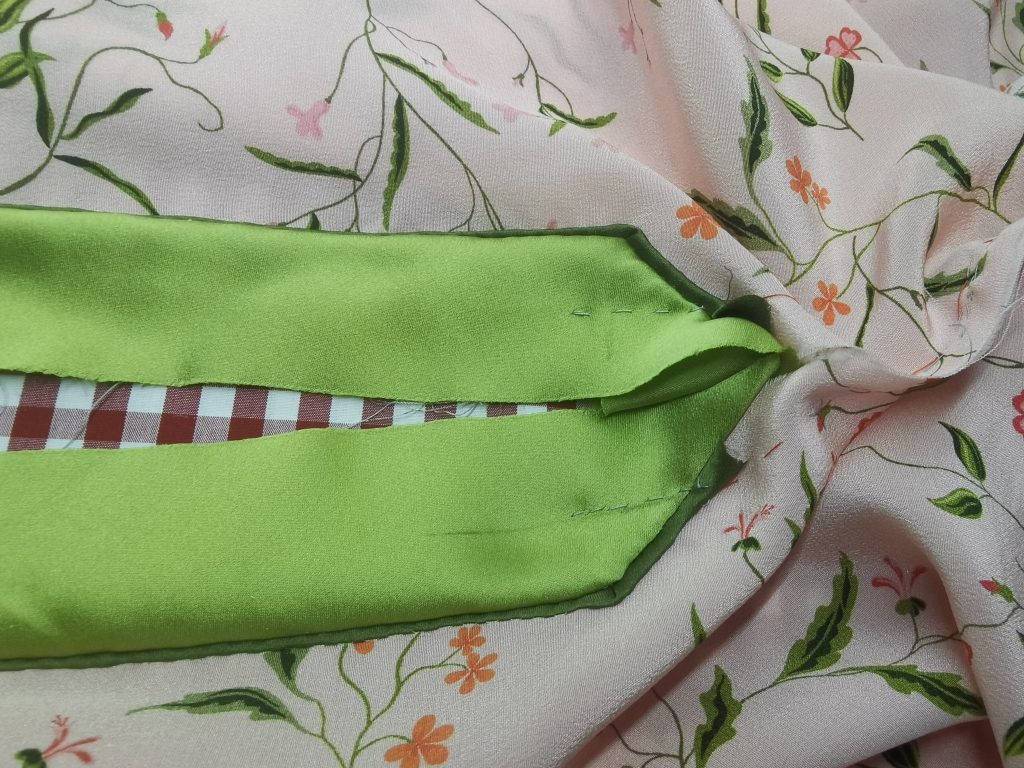
Turn to the wrong side. Clip the seam allowance at the tip of the corner perpendicular to the seam, which is the mark on the right in the picture.
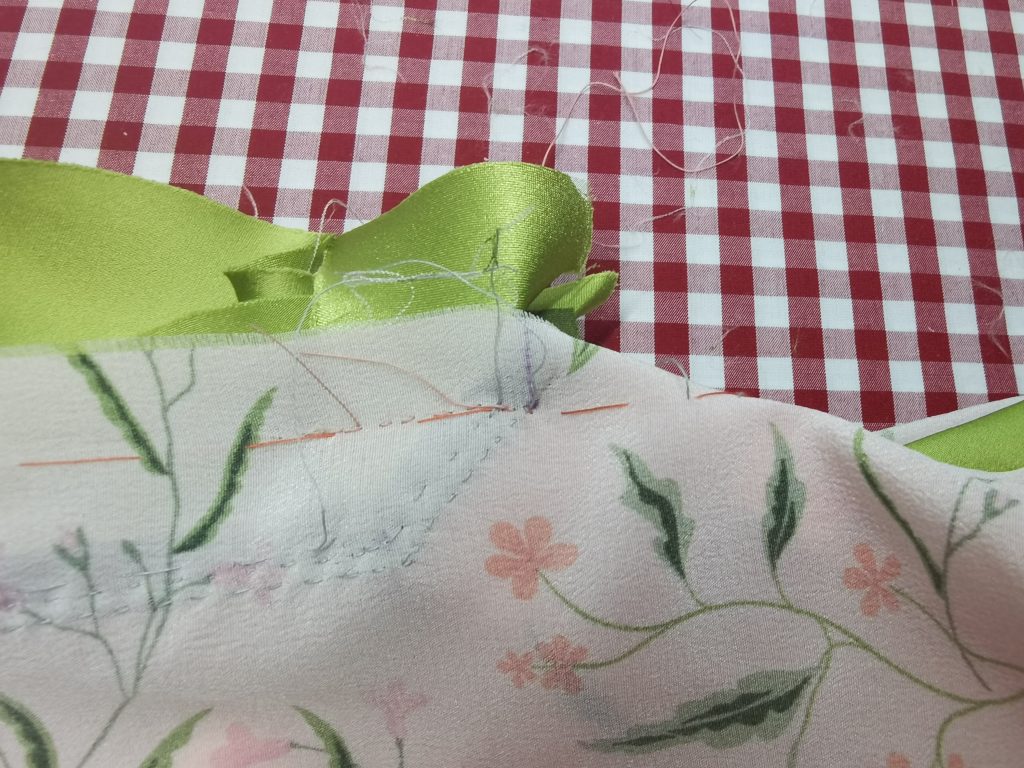
This allows you to French-seam the portion above the slit, which is unfinished from Step 6. Make a small diagonal line at the end of the French seam. Trim away the excess seam allowance, turn and sew the second row of the French seam from the tip of the slit back to the sleeve cuff.
On the wrong side of the slit, trim away the excess seam allowance on the main fabric and finish the binding. I neaten the top by folding the bias tape. It is difficult to finish the raw edges of the narrow dark green tape, but fortunately it is only a very small bit cut on true bias, so it is not going to unravel as long as other parts are appropriated stabilised.
Above: Finished slit on the left side.
- Finish the edges of the back piece
Continuing from the left side seam, finish the binding of the back hem and up the right side. Treat the right side as the back half of a slit and finish it the same way as you sew the left side.
- Finish the cuffs
After pressing the side seams towards the back, finish the cuffs.
- Make knot-and-loop buttons
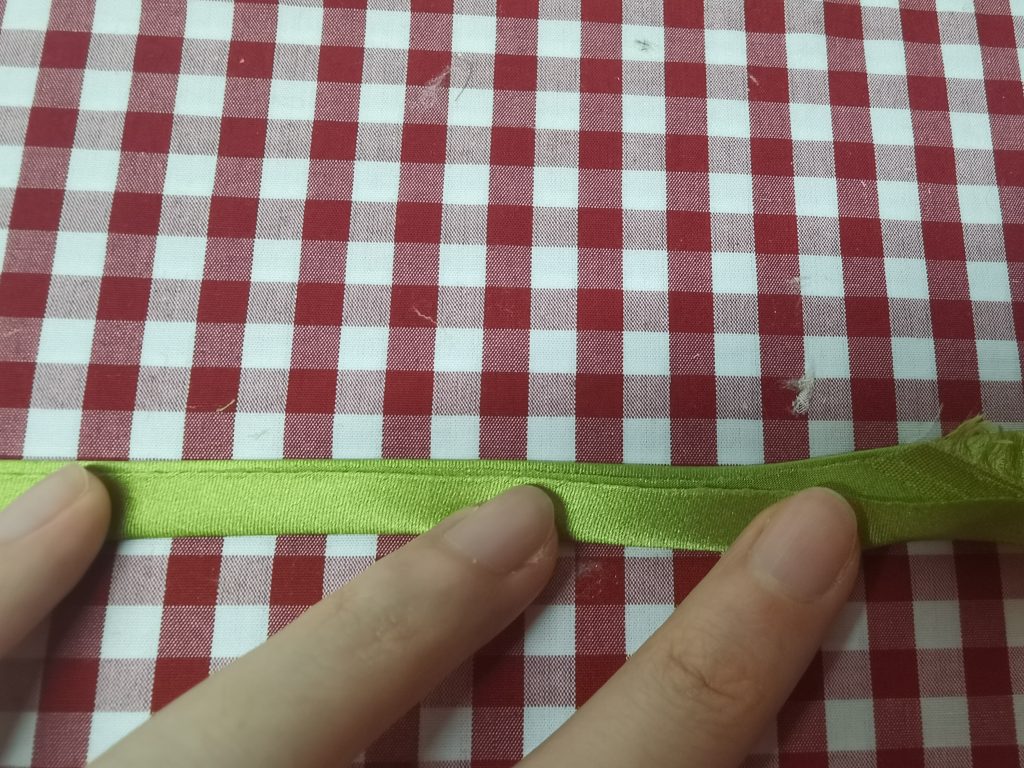
I use the same silk from the binding to make the buttons. This is a 16-momme silk charmeuse and I fold it vertically three times to make a cord with eight layers. For the second fold, I keep the raw edges 1mm away from the folded edge. This way, the raw edge will not show after the third fold. I press the first and second folds into shape and whip-stitch the folded tape together. The whip-stitch lends some flexibility to the tape so you can stretch the cord to make it narrower. I use a 4cm-wide bias tape for this and end up with a 4mm-wide cord.
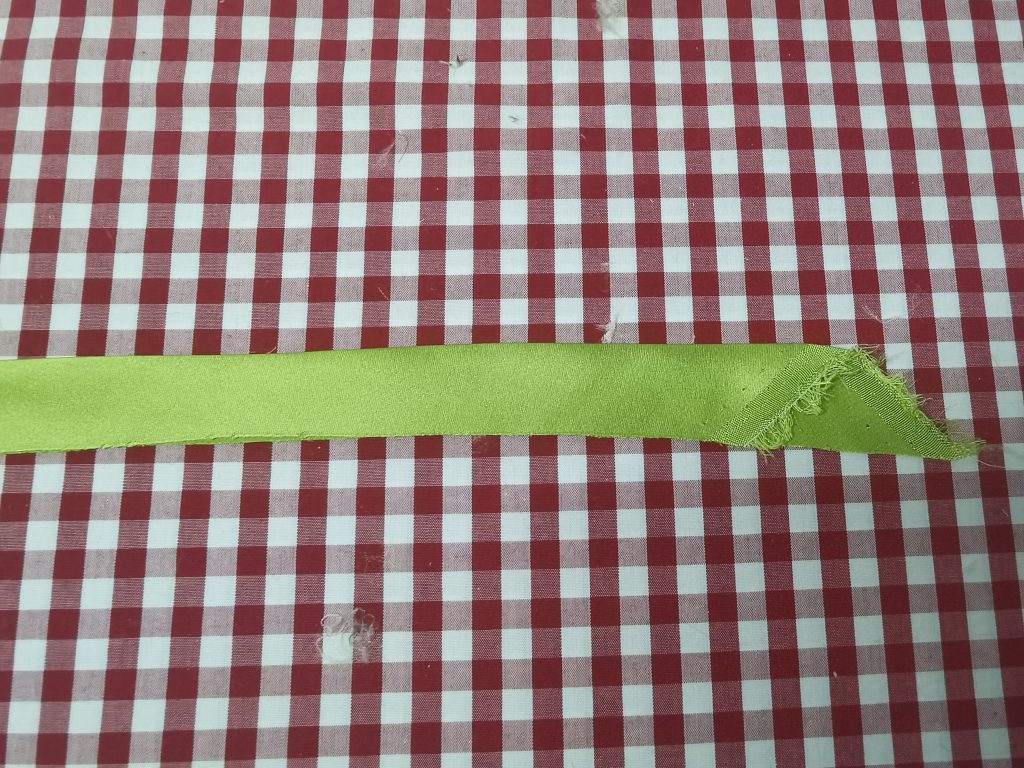
Above: The first fold.
Above: The second fold.
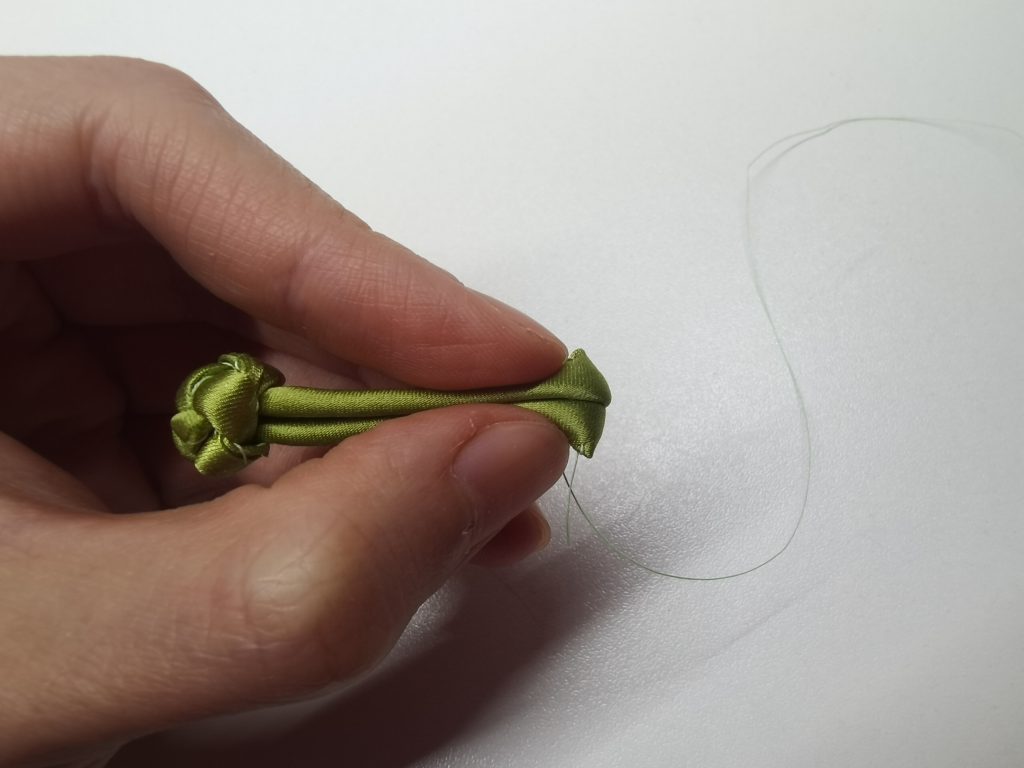
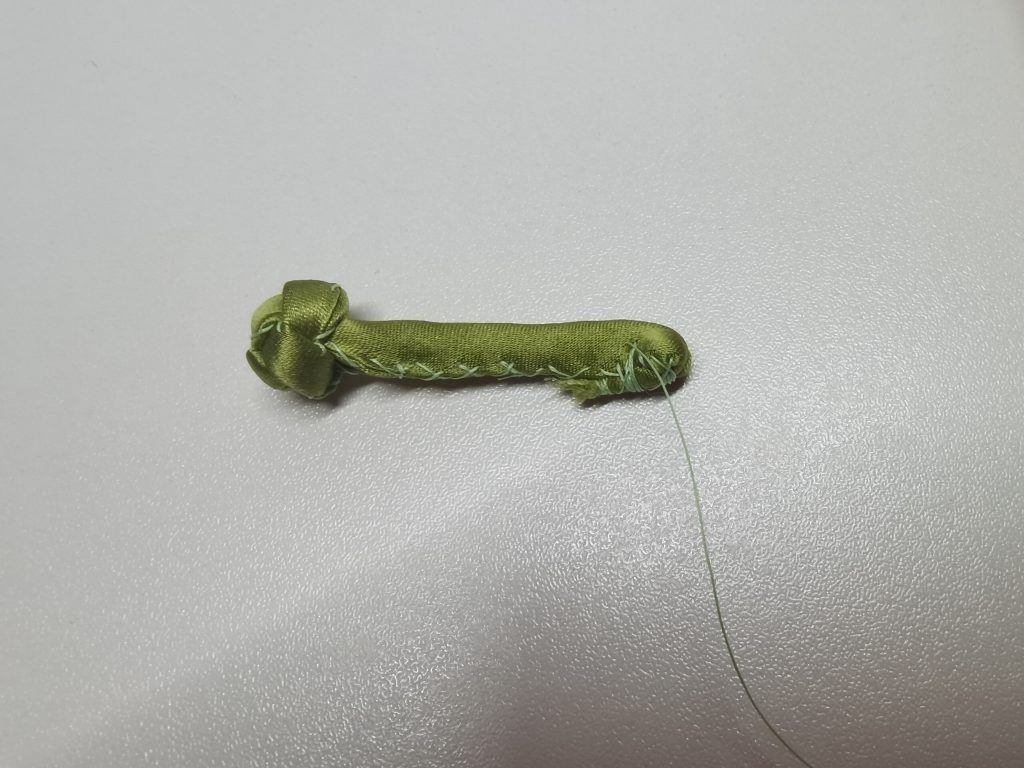
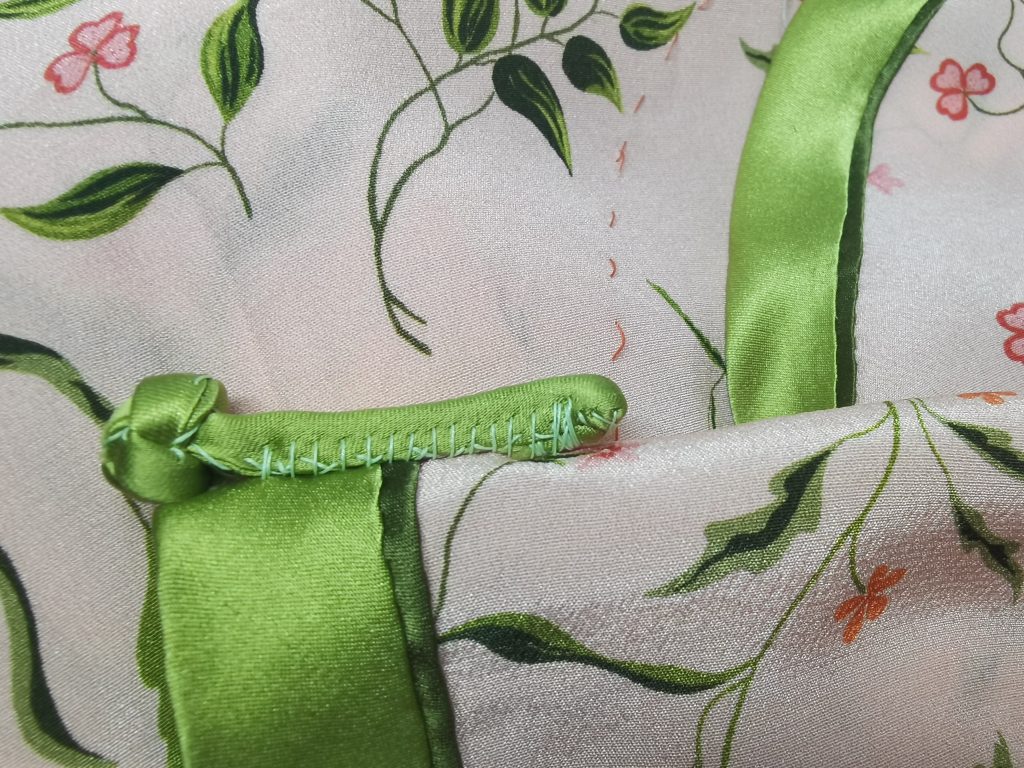
Please see the video for how I make the knot (for now it is at the bottom of this Tumblr post). I like to hold the two ends of the cord securely in my left hand as I neaten up the knot. Pull the cord tightly and you should end up with a very firm and round knot. The whip-stitched sides of the two ends should face the same side.
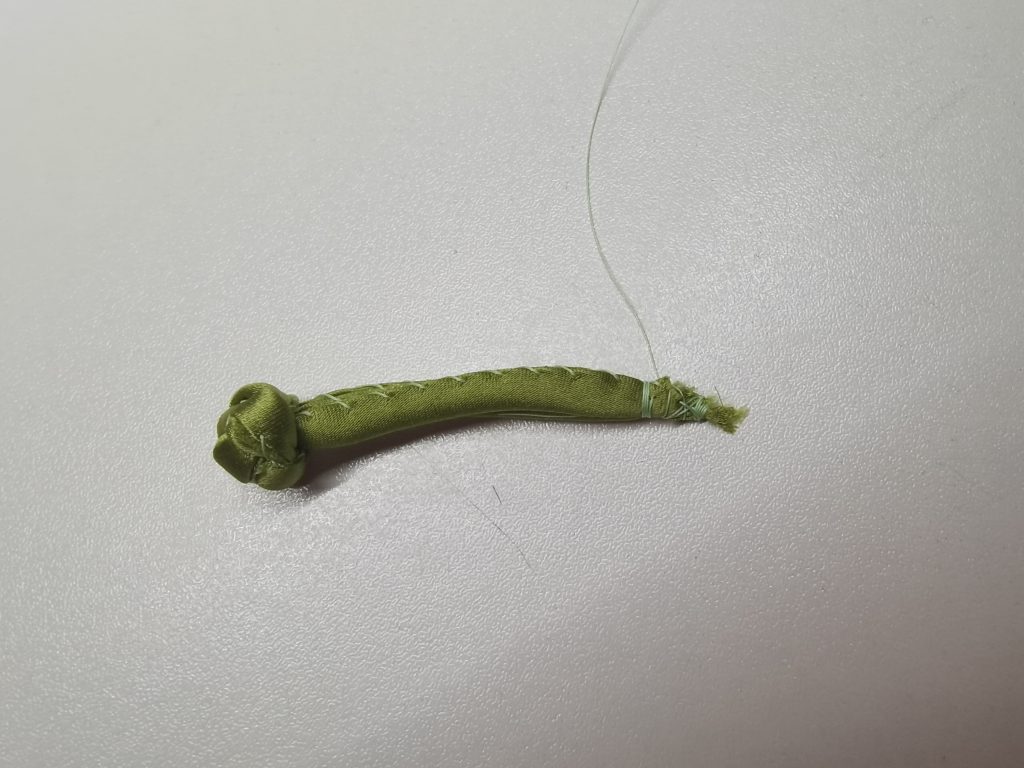
To finish the button, insert the needle from between the two cords. There is no need to anchor the thread as it will not slip.
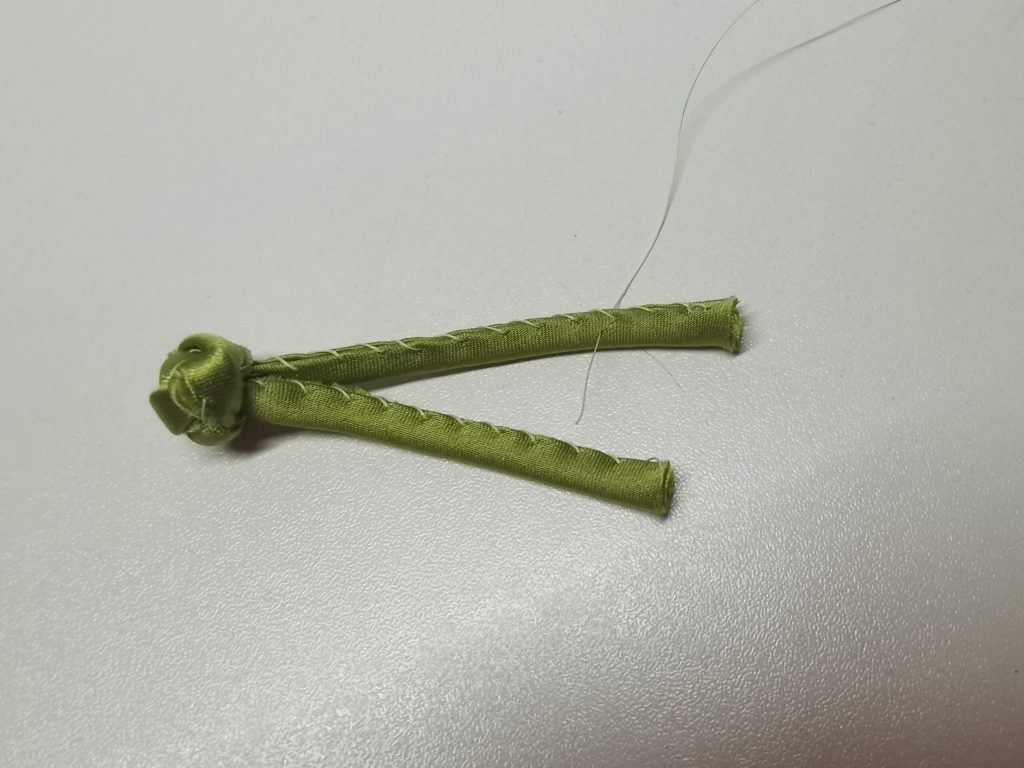
Wrap tightly twice or three times around the cords and sew through the two cords to secure the thread.
Snip the ends into an elongated triangle. I also like to trim away the excess fabric inside the triangle.
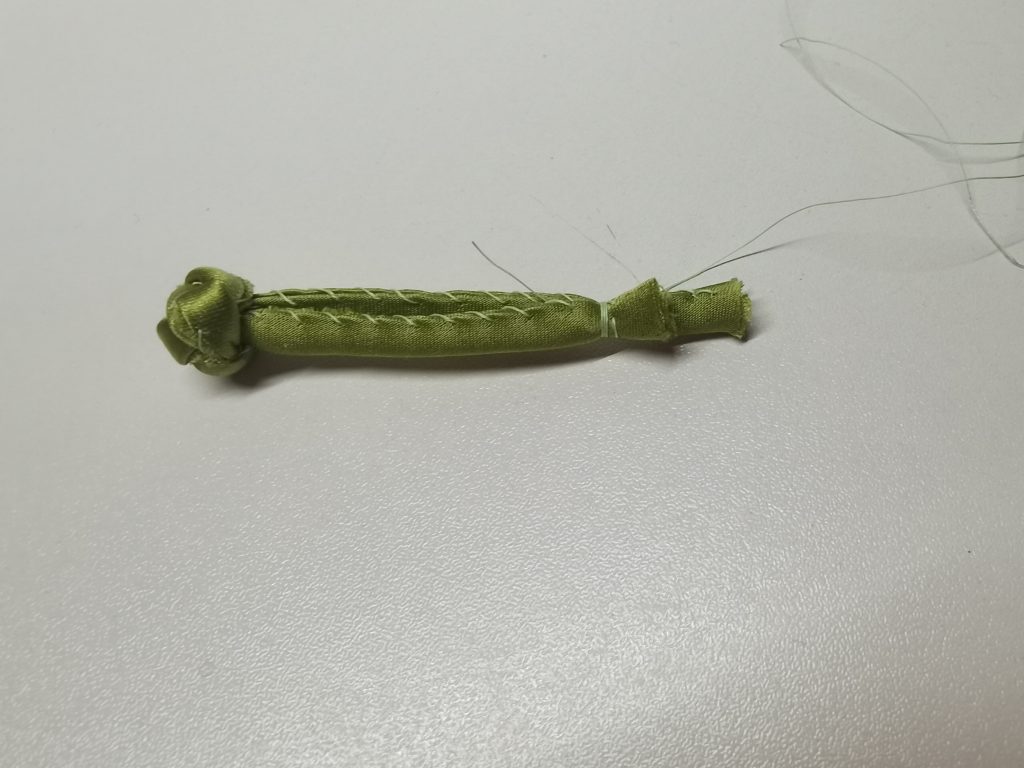
Continue to wrap tightly a few times and secure the thread.
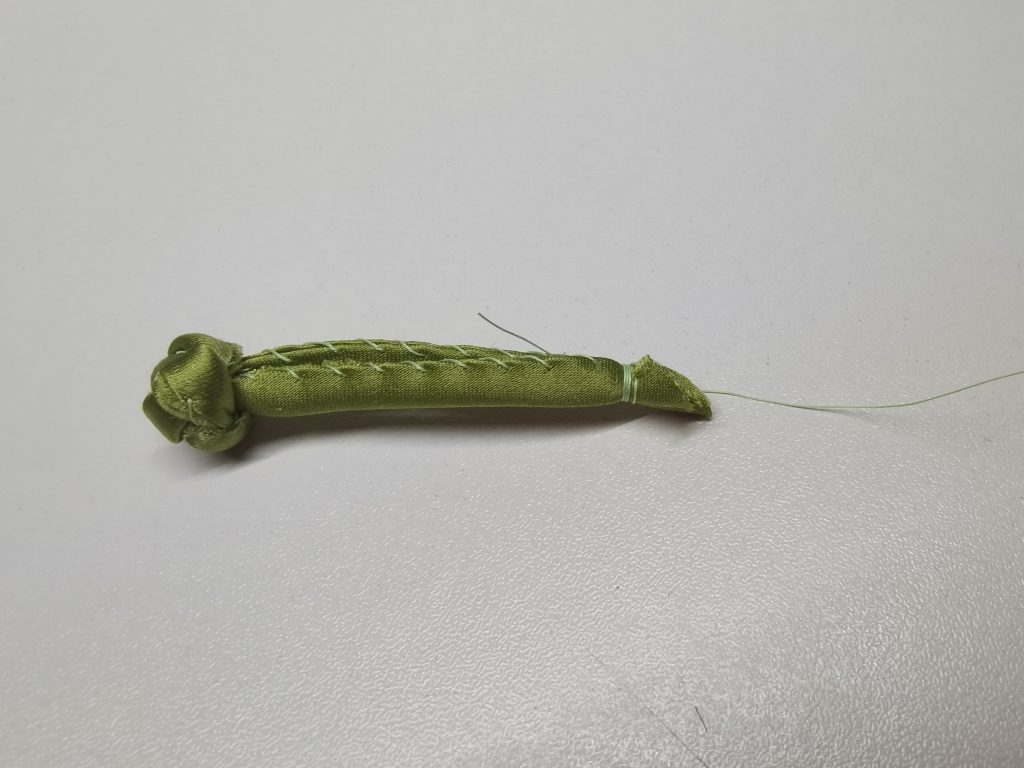
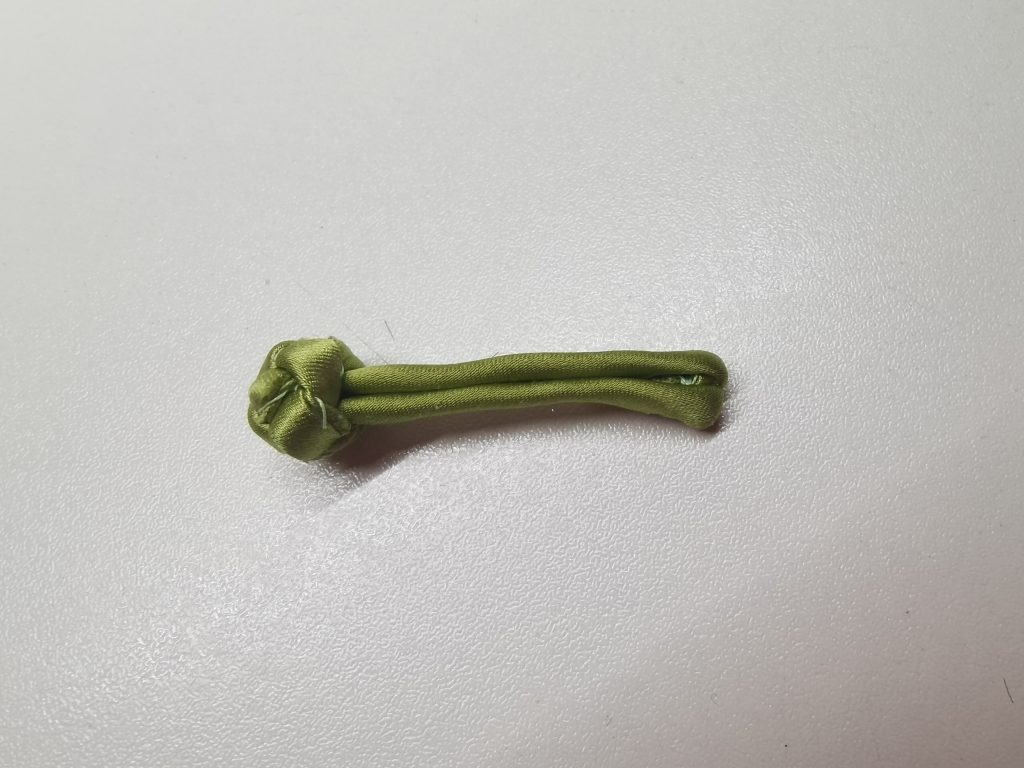
Turn the button so the side without the whip stitches face you. Flatten the bit immediately before the wrapping and fold the triangle underneath. Use the remaining thread to sew through the triangle and the cords to secure the end, placing the stitches strategically so that the button is narrow.


It is important to flatten, instead of opening the cords. Compare the two buttons below: flattening the cords avoids leaving a gap.
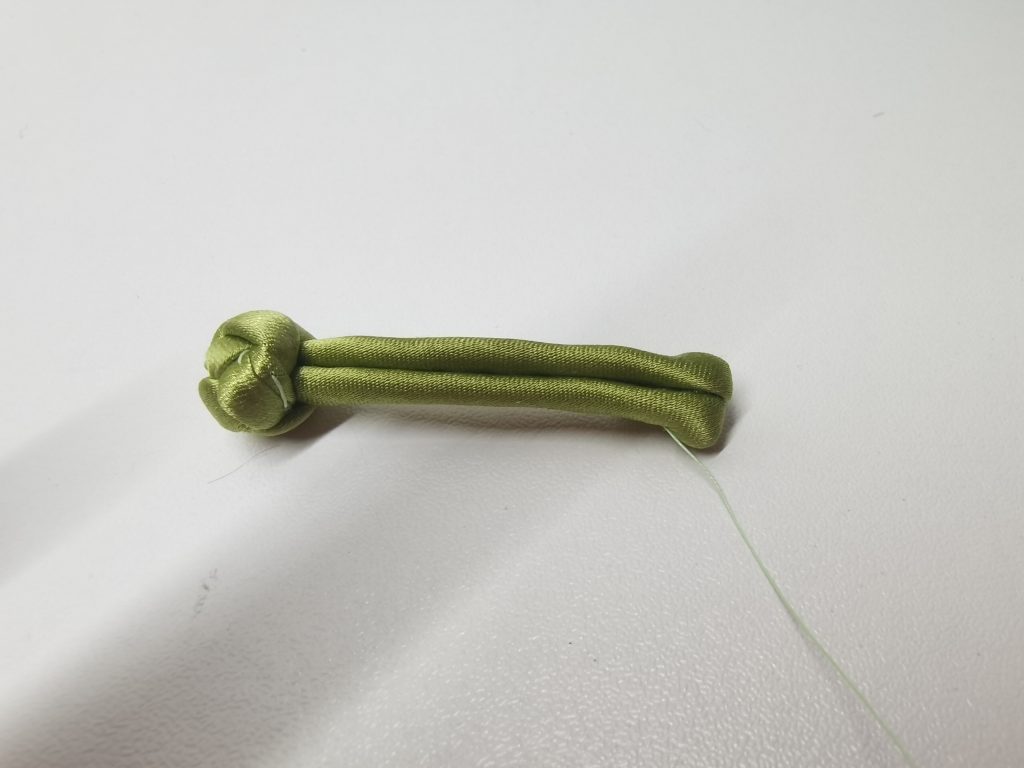
Add a few whip stitches to sew the two cords together. The direction of the whip stitches should be opposite to that of the original ones, as this helps correct the twisting of the cord.
Everyone works differently so it takes a trial or two to know where to sew the end so that all buttons have the same lengths. They do take a lot of practice. I make spare ones so that I could pick the prettier ones.
- Sew the buttons
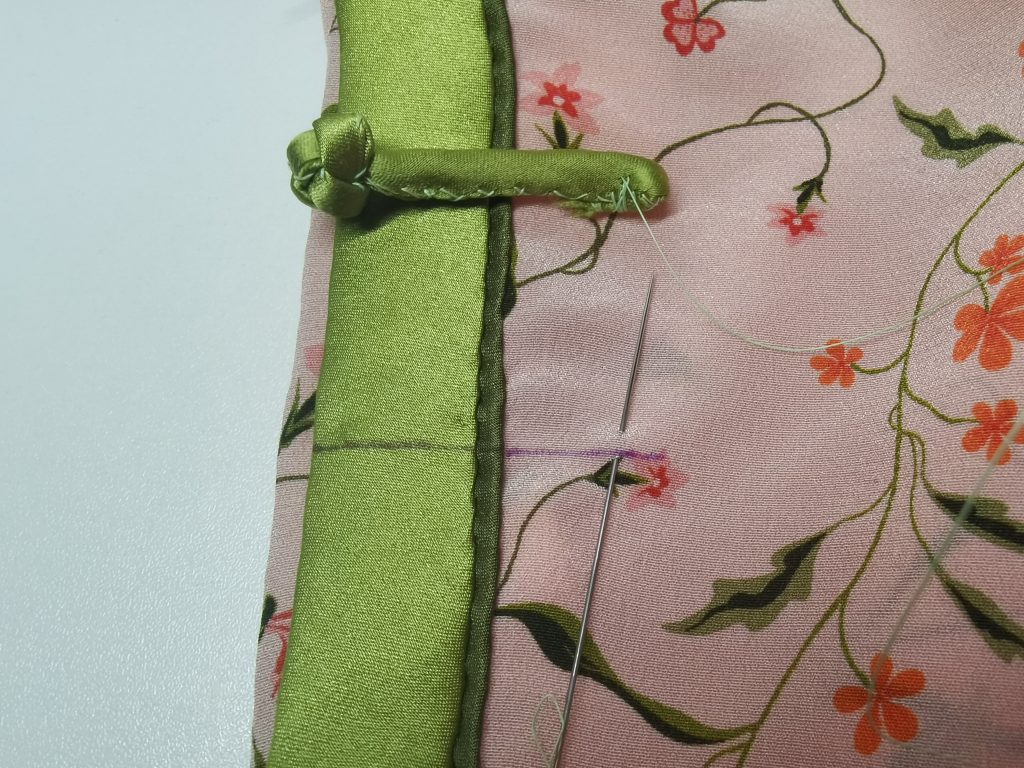
Arrange the buttons so that the knots sit exactly on the seams.
Draw or thread-trace where you plan to place the buttons. I anchor my thread within the button as there is no place to hide the thread ends on the main body. The thread should be on the side of the button facing you. Sew from the end of the button. The first stitch is perpendicular to the marked line.
Bring the needle out and insert it perpendicularly through the button to bring it back.
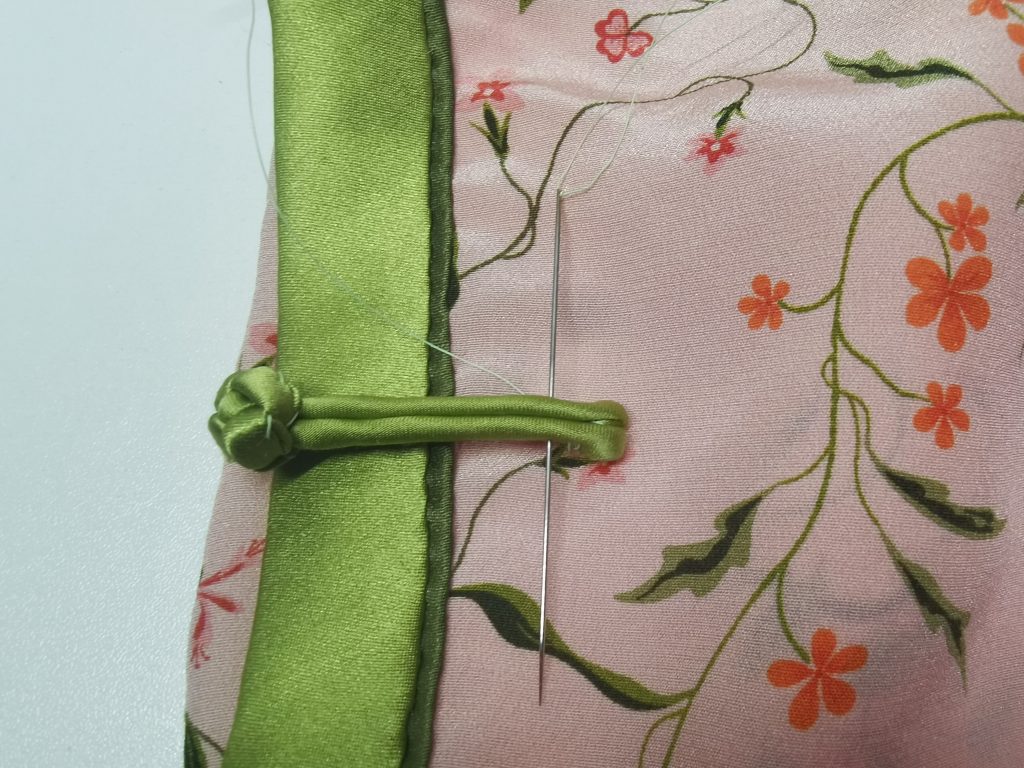
For the second stitch on the main fabric, insert the needle into the same spot where you sew the first stitch, but make it diagonal to the marked line so that it comes out 2mm away from the first stitch.
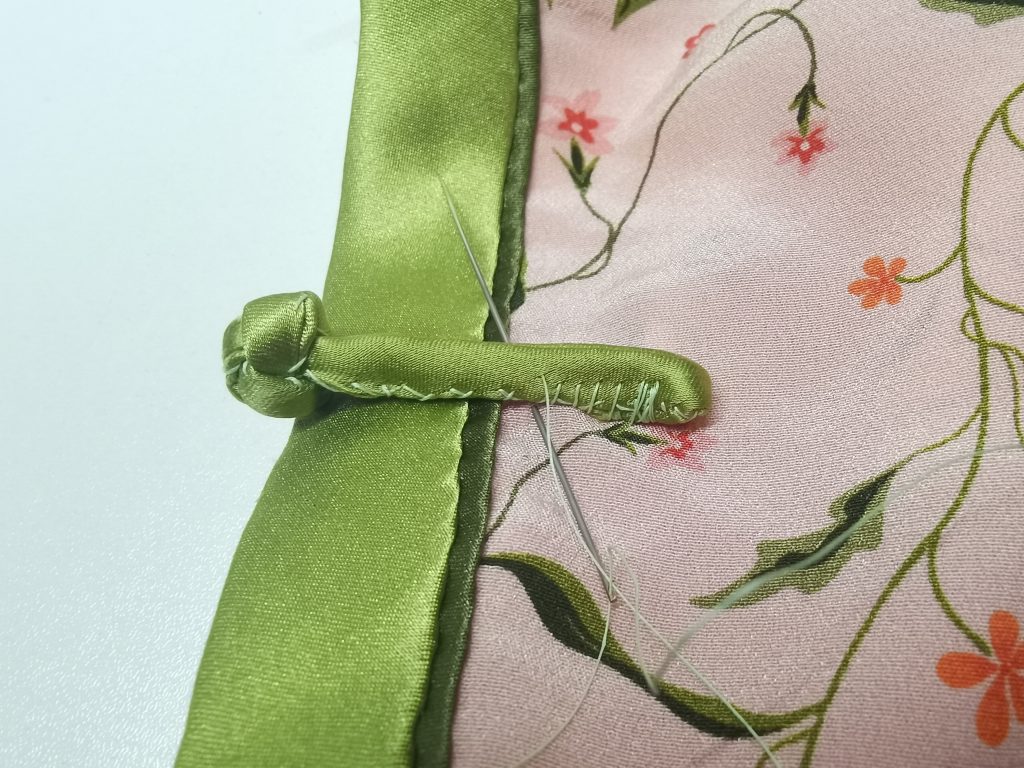
Repeat the steps to sew towards the head of the button. All the visible portions of the thread should stand perpendicular to the surface of the main fabric. They should be even and about half the height of the button. I repeat the final stitch and tie a knot, hiding the thread end inside the button.
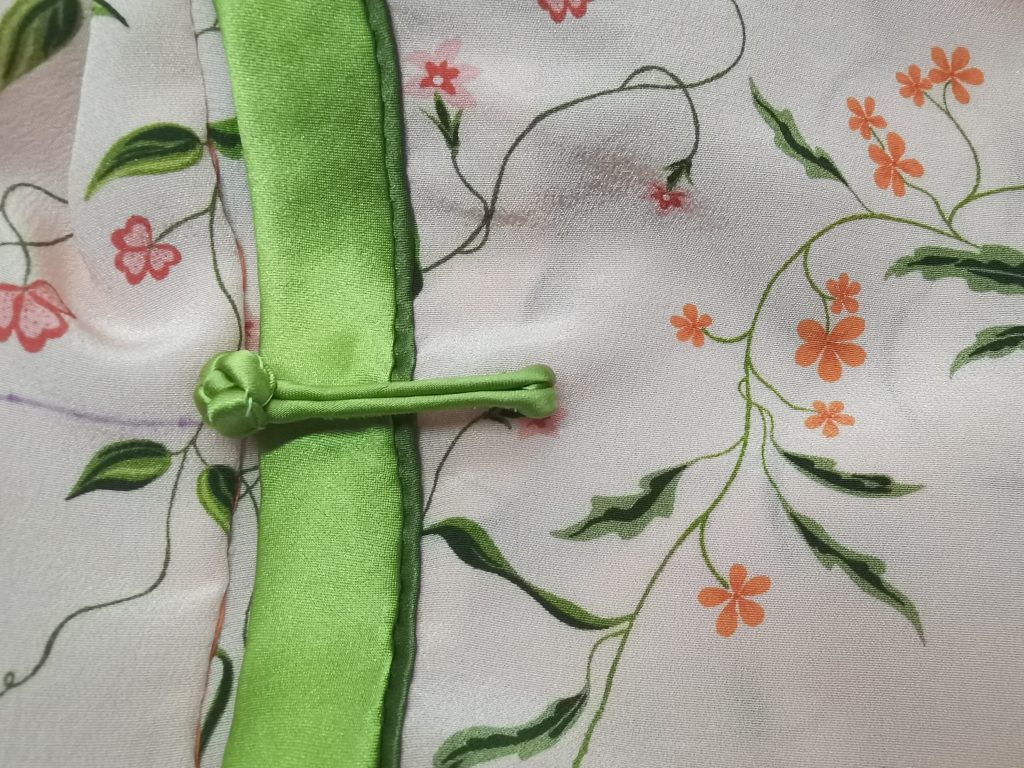
Above: The finished button.
The loops are sewn in the same way.
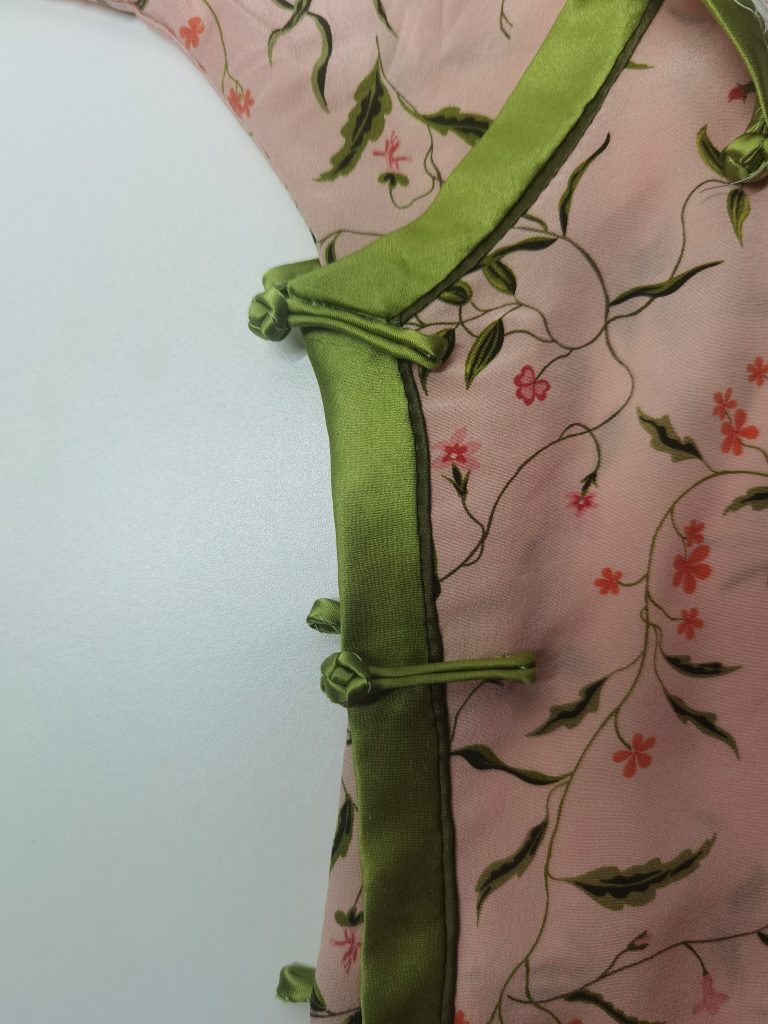
I sew from the bottommost pair of the buttons because it is the least noticeable. Hopefully I will have gained some experience when I need to sew the ones near the neck and on the collar.
Note that the top button on the side is slanted and the buttons near the neck are vertical, which provides the best support for the fabric to hang on the body.
I do not sew through the lining when I sew on the collar buttons.
- Sew the snap buttons to the opening
Snap and hood-and-eye closures are very much historically accurate. I sew a pair of hood-and-eye closures to the top of the collar and one or two pairs of snap closures on each side of the neck opening. These are done with buttonhole-stitches. I have nine pairs of buttons on the right side, which is enough to close it securely. I will sew snap closures on the side, too, if I place the side buttons more sparsely.
- Press to finish.
Finally, to get deep again with a wee reflection.
It has been my wish to write about qipao for an English-speaking audience. It has been way too easy to find sexualised depiction of qipao in art and popular media, not to mention that some of those were made by Western authors according to their imagination of the Far East in ways that ignore the rich and nuanced cultures of its wearers. Instead of an essay on the double discrimination faced by women of colour or orientalism, I offer a description of the history and construction of qipaos.
Dressmaking could be a way to appreciate, rather than appropriate, other cultures, as it prompts us makers to observe existent garments in detail and consider what is beautiful and dignified. Why we adhere to some rules whilst making creative decisions? Why must the collar be so fitted? Why do we add positive eases? For me, low side slits and generous eases suggest the female body with an attractive subtlety and are practical for moving and eating. I also appreciate that the smooth lines of the sleeves, shoulders and collar are the same as the graceful curves of Chinese art and artefacts for millennia. These are some of my examples to show that whilst garments are specific to their times and often showcase the dynamic, intertwined nature of cultures, respectful adaptation is based on a genuine understanding of the original culture.
Enjoy making!
Leave a Reply
You must be logged in to post a comment.