Despite the different types of neck openings, traditional ‘flat-cut’, dart-less qipaos use the same basic pattern. Here are the measurements to take:
Horizontally:
- Circumference at the base of the neck. (Positive ease: around 1cm.)
- Neck circumference. Measure at the intended height of the standing collar. (Positive ease: around 1cm.)
- Upper-bust circumference. Measure just below the underarms. I find this to be especially important if you have prominent back muscles, but it is also generally needed to avoid excess underarm wrinkles.
- Bust circumference.
- Under-bust circumference.
The positive ease for the bust circumferences can vary a lot. I prefer a snug fit so I start with 2cm. I’ve also seen a positive ease of 10cm that worked very well. It is important to breathe in and expand your chest when you take the measurements.
- Waist circumference, only if you want the gown to hug the true waist.
- Hip circumference. It is a bit more complicated for me because I sort of have two widest points at the hips. One is at the widest point of my hips when viewed from the front (close to the greater trochanter of the femur), and the other is from the widest point when viewed from the side. I take both circumferences and note down the distance to better estimate the shape of the dress. (Positive ease: 8-10cm. It can be smaller but then it would be difficult to sit down.)
- Armscye circumference. Place the tape snugly at the armpit, not the top of the arm. (Positive ease: around 4cm.)
- Circumference of your arm next to your arm pit. Take this into account if there is a significant curve around the biceps/triceps area.
- Circumference of your arm/cuff (where you want the sleeves to end). (Positive ease: 3-4cm.)
- Tongxiu/length of sleeves. Hold your arms horizontally like an aeroplane and measure from one cuff to the other.
Vertically:
- Length of the upper body in the front. Measure from the top of your shoulder (at the base of the neck) over the curve of the bust to the waistline.
- Length of the upper body in the back. Measure in the same way as Step 13 but in the back.
- Total length of the qipao: measure from the CB at the base of the neck to where you want it to end.
- Height of side slits. I am 160cm tall and usually the top end of the slits is 25cm below the hip for them, near my knees. Keep in mind that when one sits down, the qipao would ride up quite significantly.
- Height of standing collar.
Figs. 5a and 5b illustrates how to use these measurements to draft a pattern for the front and the back.
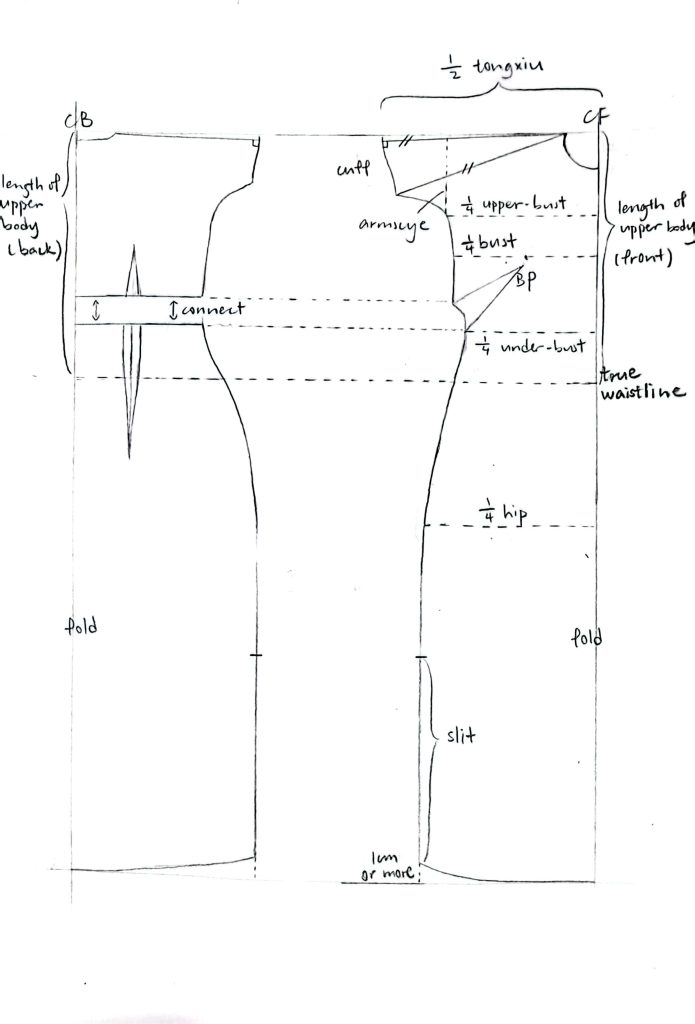
Figure 5a: The front and back of a qipao. The shoulder line has to be slightly slanted when the entire qipao is cut in one piece. In other constructions, this is optional.

Figure 5b
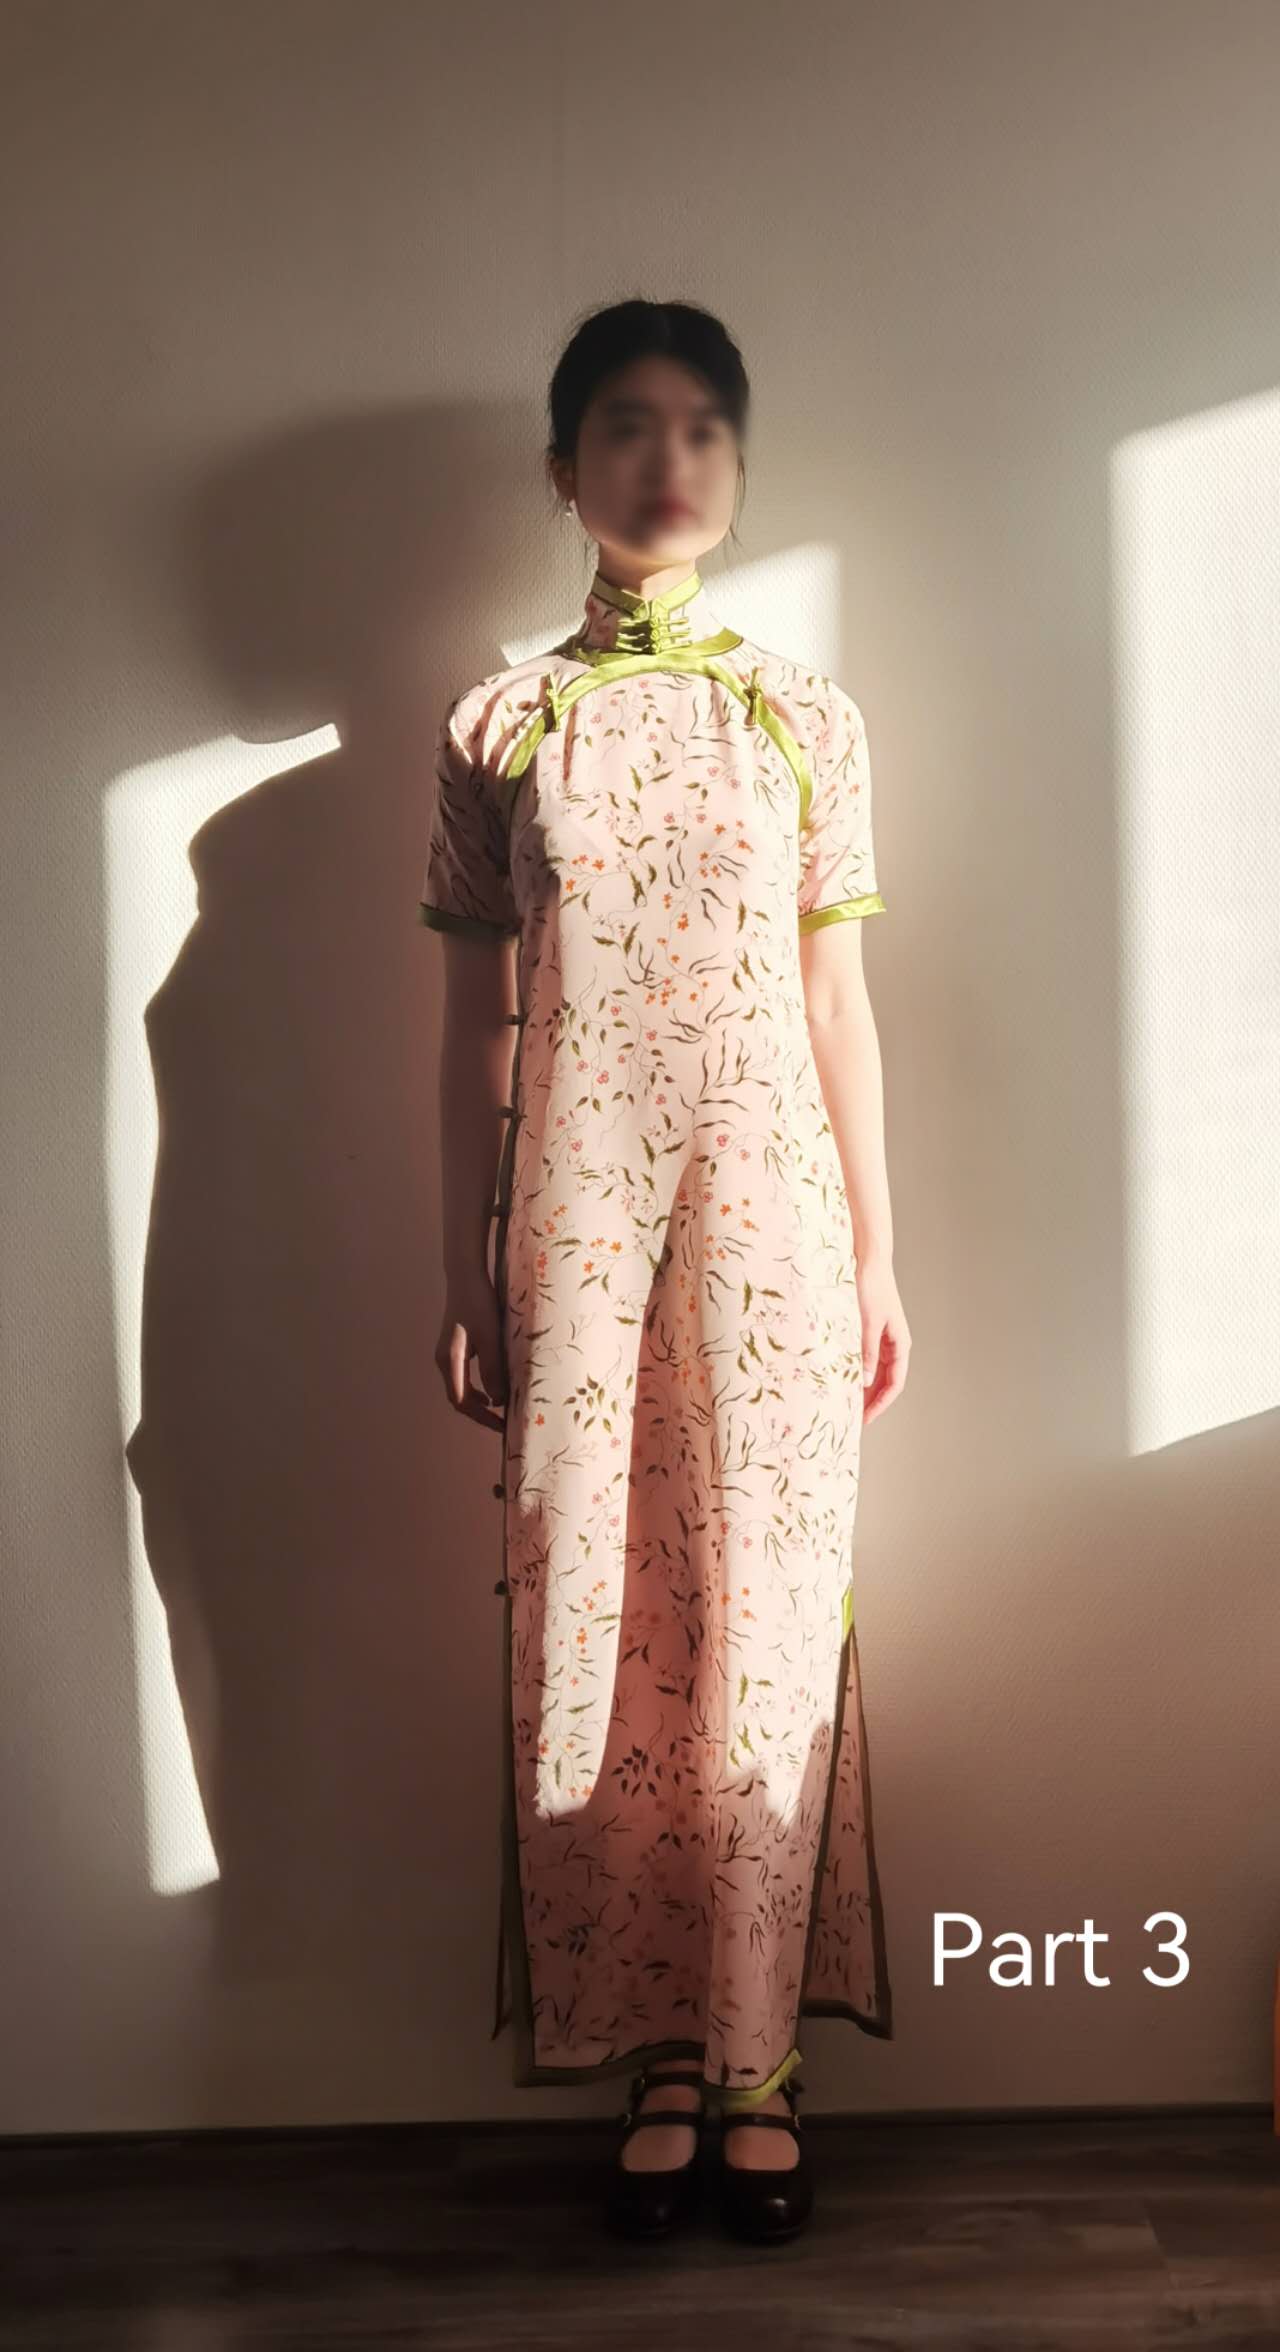
I feel that a good qipao requires so much shaping in the pattern-drafting and cutting process. The key is to individualise the pattern to the wearer’s body—not everyone has a belly curve or wants a fitted waist. Some people might need to accommodate prominent quad muscles on their thighs, as is in my case, or other curves.
For the modesty panel, I use the back side of the main body to make the pattern for this thin strip of fabric of around 5cm wide. You may use the front side of the pattern as the guidance instead if the bust area is curvier. There is no dart on this panel.
After obtaining the basic pattern, I adapt it to the style of qipao I want to make (Fig. 5c)
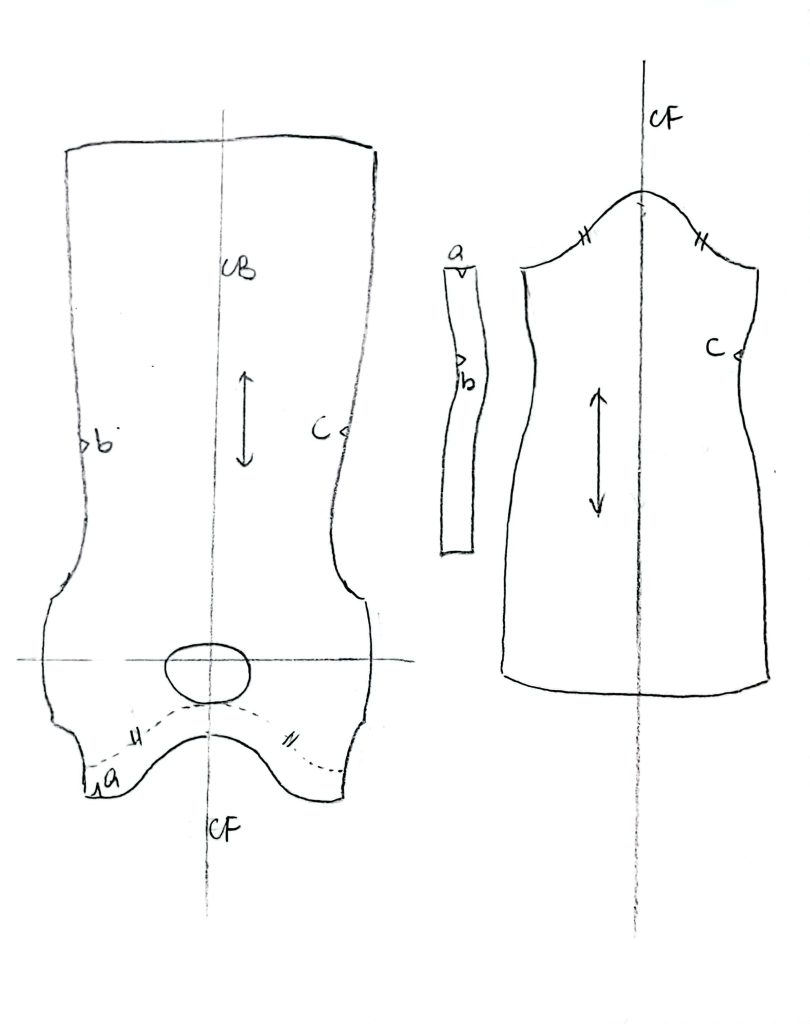
Figure 5c: The upper-bust area of the front of the body is connected to the back piece, with a general seam allowance that serves as the under-side of the overlap at the slanted opening. There is a separate front piece. The modesty panel down the right side needs to be cut separately.
Leave a Reply
You must be logged in to post a comment.